Latest Posts

Some WIP Shots and Slowing Things Down (for now)

Between the reemergence of the sun, writing books, and chasing after two little boys, I have realized that I need to slow some things down. But part of that slow down is to make sure the articles I publish here are not rushed or forced.

So with that said, let’s check out what is on Joe’s painting table first and get back to the boring blog stuff after.
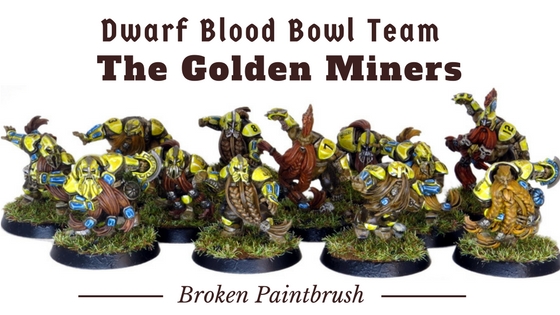
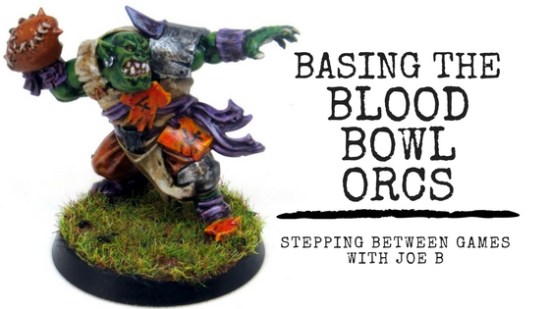
WIP Blood Bowl

With two Blood Bowl teams completed (Orcs and Dwarves), I had turned to the balls and tokens so that I could get a fully painted game in.

Work In Progress Blood Bowl Tokens

As with many things on my painting table, I got started and then distracted. At this point, both teams (and the human team) are mounted to bases and primed. The ball mark, the one meant to fit in each base, is press-fit into a spare base. All the others are glued down.

I’ve made decent progress on the Dwarf team’s markers with all the base colors and wash completed. I will probably only do basic cleanup on the tokens but have the balls match the players.

Rainbow Warrior Project

One of the distractions that came up in this last week is a spontaneously formed group on Twitter that has decided to paint an army of Rainbow Warriors for charity. The whole thing has been a bit chaotic, and very much figure it out on the go. So this should be fun!

Rainbow Warriors Sargent Conversion

I volunteered a tactical squad as I had plenty of bits laying about. As the Rainbow Warriors have had some hints of Aztec/Mayan theme, we decided to roll with it. With a few Lizardmen bits and Dark/Blood Angels added for character, I was able to put together a cool looks sergeant.

Rainbow Warriors Project Tactical Squad WIP

The rest of the squad is fairly standard as we didn’t want to go too over the top. But a little tweaking to some of the poses adds some character. I’ve got them primed, but need to pick up some more paint before getting started on the colors.

Rainbow Warriors Deathwatch WIP

As I was building and painting a squad anyway, I figured I would add one of the Warriors to my small Deathwatch Kill Team. Perhaps the headdress is a bit much, but it is a neat bit, and I had no clue what else to use it for.

I’ll share some more info on The Project as it comes together, but it will be well worth following. It is a great set of painters and hobbyist involved and looking to be a massive army.

Slowing Things Down

Ok, so back to some of the less exciting things.

For the last year, I have been working on posting 2-3 times a week to the blog. The fixed schedule kept me on track and was easy to plan. And I think I’ve posted more in the last year than the previous seven combined.

But this last month has been grueling to get posts out that I was proud of.

I was writing 1,000-3,000 words a day on the book, trying to figure out the publishing world, and it’s been crazy at work for both the Mrs and me.

Real Worldâ„¢ right?

Anyway, this all comes down to deciding to reduce the schedule of the blog to every four days and see how it goes. I will also reduce my newsletter, The Brush Stroke, to every other week. They aren’t big changes, and you may have not even noticed them, but I always want to work from a level of transparency.

On the flip side, I have barely commented on anyone’s blog in the last month. I know some may shrug at that, not only have I written on the importance of the community, but I miss really checking out what everyone is up to.
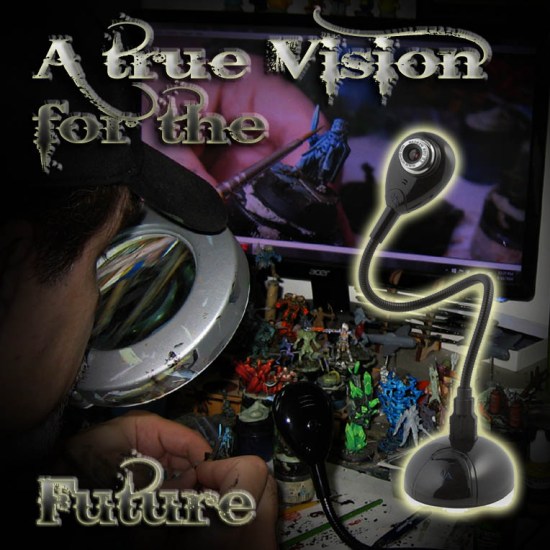
The Future

Who knows what is ahead, but I am working towards some short term goals here.

The biggest is getting all three of the full sized books out before the end of the year. I think each will be easier in some ways as I have figured out many of the obstacles. But each will have its own set of challenges. Like what to put into a book on painting miniatures and what to leave out? If I’m not careful, it could become a 500-page beast that will never get out!

While this next season of Broken Paintbrush will be a bit quieter, I still have some great tutorials and posts planned. They will just be a bit further in between!

After the books, I have way too many grand plans to think about, but suffice to say, great things are yet ahead.

Good Reads 52

Good Reads 52 with Nurgle Titan, Painting Tutorials, and a Cult

Another awesome week of hobby posts to check out in today’s Good Reads 52. Come see some of the work done by fellow hobbyists, learn from tutorials, be inspired, and some things to think about.

Good Reads 52

While it has been a busy week here between finishing a book and getting started on a crazy Rainbow Warriors Project (more to come), it is awesome to poke my head up and see what others have accomplished. Sorry I haven’t commented on your site lately, but I do bookmark posts to eventually get back to 🙂

But for now, dig into this week’s Good Reads, they are another set of amazing work.

The White Knight

White Chaos Knight

Knight by Nick Thrower

White isn’t a color you see very often in the fantasy setting, especially on chaos warriors. But Nick has done a great job with this Chaos Knight, the start of a new AoS army.

Rotten Skin

How to Paint Nurgle Skin

Nurgle Painting by Rednekkboss

The Rednekkboss has become proficient with the multiple wash technique. Here, he put together a tutorial on how to paint rotted skin that looks incredible. It has a ton of steps, but most looked quick (and then wait to dry).

Astral Claws

Astral Claws Techmarine with conversion beamer

Valthex by Tyler M.

While the full post is Tyler showcasing his really nice looking Astral Claws army, this Techmarine with Conversion Beamer caught my eye in particular. It is a great conversion that tells a bit of story along with it. Notice the servo-harness helping to hold the weapon?

The Osseous Throne

Tyranid Cult Osseous Throne Build

Cult by Mr. Pink

Mr. Pink has been on here before with his awesome conversions and sculpting skills. Unsurprisingly, his Cult force won his store’s Inner Circle, but even cooler than that: he gives us a step-by-step process of how he made the cool Osseous Throne, only hinted at in the books.

Shining a Light

Painting OSL to give ambience

OSL by Kristian Simonsen

I need to already update my tutorial list for doing OSL, Kristian painting up this diorama to show how lighting can change the ambiance of a scene. It is not as much of a step-by-step, but more of a general guide for each major part.

More Evil Trees

Converted Evil Durthu

Bog Durthu by NafNaf

Adding another monster to his growing collection of nightmares, NafNaf converted/demonized Durthu for his Bog Sylvaneth force. But really, it is all the details and texture that is incredible on this conversion.

Nurgle Titan

Converted Nurgle Knight Titan

Nurgle Titan by Dean Kelly

There seems to be a lot of bad guys in this weeks post. Either way, Dean’s converted Nurgle Titan looks great and has all sorts of demonic touches throughout the model. And sounds like this is just the first…

Taking Better Pictures

Using a shadow tent for miniatures

Photo Setup by Nazroth

Taking better pictures of our minis is such an important thing to me that I have a whole tutorial page linked in the menu above. Nazroth shares this passion for helping us showcase our miniatures, and demonstrates the setup he uses. Best part? He uses his phone and an inexpensive shadow box.

Beaten Gold

Painting Beaten Gold on Stormcast

Stormcast by Stats

Some people are a fan of bright and shiny, others like to dig into the grimdark. Stats wanted his Stormcast to fall into the later and shows us how he painted this beaten, burnished gold that looks great.

The Capitan

Deathwing Diorama at Crystal Brush

Deathwing by Scott Ferguson

Scott painted this mini-diorama for the Crystal Brush Awards at Adepticon. It is an awesome piece with lots of added character, and a nicely done canvas of the Lion. Make sure to check out the back of the cloak as well for all the freehand checks.

Playing Blind

Playing Warhammer while blind

More than the BlindPenguin can see

When you think about our hobby and gaming, it is hard to consider doing while blind. But that is exactly what BlindPenguin does and shares his experience about gaming without sight. I went to school with someone blind, and it was incredible what she could do, and this is a great read on challenging our acceptance of other.

Good Reads 52 Wrap Up

I hope you found some articles to dig into and enjoy. I’ll be back soon with more Blood Bowl and a new charity project. Oh, and I have the first print draft of my book on my desk. A little bit excited about that one.

I Wrote a Book! Start of a New Series

After writing on this blog for a few years now, I’ve realized that I kind of like writing. And some of you kind of like reading it. So writing a book about the hobby would make sense then yeah? So that is what I did, I wrote a book. Well, two books so far.

A Free eBook

If you enjoyed the How to Improve Your Hobby Skills series of posts, I hope you will like these books. Especially since the first is the three posts (Building, Painting, Showcasing) and formatted into PDF, Kindle, and eBpub books.

I struggle to read books as PDFs, especially on my phone. So I felt stupid for providing only a PDF for that series of posts. Now, you can get the book (still for free) on nearly every eBook platform. Kindle, iBooks, Nook (still around), Kobo, and a few others.

KindleApple iBooksKobo Books

Even more stores through this link.

Improve Your Building Skills

So, getting the free book published on all these different stores was an adventure (one I’m still figuring out). But it got me thinking about expanding out the series into an actual you-might-pay-to-read, kind of books.

No visions of retiring soon here, but earning a trip to Adepticon next year? That would be cool.

How to Improve Your Hobby Building Skills BookSo I took the first third of the free book (~5,o00 words) and expanded it out to 25,527 words of how to build miniatures. Not the sexiest subject to write about, but I had such a good response to each section of the series, I want to turn each into a full sized book.

Right now, How to Improve Your Hobby Building Skills is on pre-order for a June 3rd release. And since I’m down to the final tweaks proofreading, I feel pretty comfortable that I will hit that arbitrary date 🙂

KindleApple iBooksKobo Books

More stores at https://www.books2read.com/hobby-building-skills

 What’s Next?

If you are a regular reader here, have no fear that I will turn into a book sales pitch machine. In fact, not much will change on the blog at all as this is part of my hobby as much as picking up a brush. Don’t want to buy a book? Cool, I’ll still put together tutorials, showcases, and Good Reads as always.

But if you do like books, and hopefully my books, I have more in store. The first up is a print version of the Building book. This is an experiment in print-on-demand and so far is a lesson in pain. But I love physical books, especially resource style books, so I want to make it happen.

Sneak peek at the WIP book cover!

Next up will be the Painting and Photography books. Both are going to take some time, and in the case of the painting book, I need to decide on what topics to cover in this book. My dream would be to have a whole series, covering topics from absolute beginners, to award winning tips.

But I hope to not do it on my own. When I looked for similar hobby books on Amazon, they are almost non-existent. Not even regarding Games Workshop focussed books, but miniatures in general. In the future, I want to enable others to write their own books and be the publisher.

Crazy? Sure, but so is our hobby 🙂 If that sounds like a cool idea to you, stay tuned to future thoughts on that topic. (still, have lots to learn!).

Want to Help?

I would love your help with the project by getting the word out. Send your gaming friends a link to the free book. Download it on your favorite device to get the ‘sales’ numbers up which gets the stores to share it more.

And most helpful of all: leave an honest review. Though, if you think something is terrible about it, email me instead so I can fix it 🙂

You guys are awesome, and I appreciate being a part of this community and adding something to it.

Brush Stroke 4 Banner

Brush Stroke 4 with Batch Painting, Warboss, Zone Mortalis and More!

Another look back at great hobby posts including batching painting tips, a Warboss, DIY Mortalis board, a Chapter Master and painting bases. Enjoy this week’s collection.

Brush Stroke 4 Banner

Brush Stroke is the weekly newsletter of Broken Paintbrush, sharing the latest blog posts from that week as well as other great hobby posts from the web’s archives. This post archive’s last year’s newsletter. If you want to stay up to date, make sure to sign up in the form below.

Painting: Batch Painting Tips

Tips on Batch Painting

Batch Painting by Cadian Shock

For those who have a heap of miniatures on your painting table and need to crank them out quickly, there is no better way that batch painting. It can be a painfully tedious process, but Cadian Shock put together his tips for cranking them out with losing only minimal sanity.

Painting: Ork Warboss

Painting Death Skull Warboss

With the new Ironjawz out, I have plans to turn the megaboss into a warboss for my 40k Orks. Having done a tutorial on how to paint my last warboss, it can give any aspiring warboss a start painting your own boss.

Building: Homemade Zone Mortalis

DIY Zone Mortalis Board

Zone Mortalis by Mike (corrm)

I have always wanted to play a game of Zone Mortalis as it seems like a great way to play 40k dungeon crawler. Mike aka Corrm built his game boards with foam and cardboard – not Forgeworld detailed but works great and way cheaper. Someone should bug him about finishing them though 🙂

Building: Painting Bases

Watch This Painting Bases

This week on Broken Paintbrush included Watch This, highlighting a video you should watch to help your hobby. This week was Garfy from Tale of Painters showing how his paints his bases including adding realistic grass tufts.

Inspiration: Mortifactors Chapter Master

Mortifactors Chapter Master

Mortifactors Chapter Master by Johnnya

White is a difficult color to paint and get a marble look has its own challenge. Johnnya painted a beautiful rendition of white marble on his Mortifactors Chapter Master. If nothing else, check out his amazing freehand work on the shield.

Brush Stroke 4 Wrapup

If you enjoyed this archived post of the Brush Stroke, make sure you sign up for the weekly email. It includes the latest post from Broken Paintbrush as well as other great articles from around the hobby web.

Something Coming (not an 8th Edition Post)

This is just a quick post as I’ve been somewhat head down the last little bit trying to finish a new project. It doesn’t involve plastic and glue, but rather I’ve finally turned all this writing I’ve been doing into an actual book!

Ironic, considering that English was my worst subject through school.

I’ll have more info next week once I nail down some of the specifics, but I figured I would go all Games Workshop and announce it before the rumor mill spoils the fun. (rumor mills cover my blog right? 🙂

Cool Tools Bits Box for Organizing Spart Bits

Cool Tool: Bits Box

After building a brand new kit, many new hobbyists wonder why there are so many ‘extra’ pieces left on the sprue. As you make more and more kits, these extras start to pile up. At some point, you need to start the almighty bits box.

Cool Tools Bits Box for Organizing Spart Bits

What might start out as a plastic bag of the remainders can quick add up over the years. In today’s post, I’m going discuss a few ways to organize all those parts, and how doing so can help with your conversion skills.

Options for Bits Boxes

The term bits box can mean anywhere you store all the extra weapon options, helmets, and even unbuilt kits.

Cardboard Box

Often, the very first bits box is the same box the kit came in. The full sprues can be slid right back into the box for later use.

Extra bits in large pile

A nice advantage of using the original box is that you know exactly what kit the part came from. Or if you are in need of the head from a particular set, you can quickly grab the box.

The downside is that as you get more boxes piled up, it can create a real mess in your closet. But even more aggravating when you get the box out, only to find the bit isn’t there anyway.

Plastic Bag

A quick way to cut down on the pile of boxes is to clip off all the extra parts into sealable bags. Each bag could be for that particular kit (same reasons as above). You could instead combine parts from the same faction.

Using a Plastic Bag to Store Spare Bits

By removing the parts from the sprue, you significantly reduce the space required. You can toss all the empty sprues and recycle the empty boxes. It also becomes quicker to see if you have any of the parts you were looking for by looking through the clear plastic.

The downside of the bags is that they don’t stack and can spill everywhere if you aren’t careful. You could put all the bags into a larger box to store away. It is back in a box, but a much smaller box.

Small Parts Box

I started using small parts boxes for my bits. Also called tackle boxes, craft boxes, and the like, these are plastic that is only an inch or so high and have movable walls inside to create different sized slots.

Space Marine Bits Stored in a Bits Box

I buy a box for each of my factions and split up each slot to store heads, right arms, left arms, weapons, etc. The one above is Space Marine bits for my Mentor Legion. The provides huge benefits when I’m building up new models for that faction as I can grab each piece I need and mix-and-match between kits.

The two big downsides with the small parts box are the cost, and the time it takes to sort. While each box is only a few bucks (this one is only $8 on Amazon), it is more than the free box or nearly free bag. Regarding sorting the bits, well yeah that is a work in progress.

Organizing Your Bits

If you go with the small parts box, I mentioned that the process of actually getting all those pieces into each slot could be a challenge. But once you do, it is easy to find the part you are looking for.

I found the easiest way to get started with the bits box is to build it as you go. If you are starting a new army, pick up a small parts box to go along with it. As you clip out the extra bits, add them to the empty box. If you go for the mix-and-match approach with kits, clip out all the parts into the bins first, and then build up the units.

To overcome the backlog of boxes and plastic bags, I recommend a good movie. Grab your pile of sprues, your flush cutters, and a bits bin or two. As you don’t need to focus too much on clipping out the pieces and sorting them out, it can be easy to accomplish during movie night.

A stack of bits boxes on the shelf

As your collection builds up, you may need to get additional bits boxes for vehicle or scenery kits (which may require deeper boxes like this one). Mine has become a collective mishmash of organizers over the years. The next step will be to add labels to the side of each bits box.

What Do You Use?

Do you have a different solution to organizing your extra bits? Or do you even hang out to the extra parts? (I’m not judging if you decided to toss them instead) Let me know in the comments and add a picture of your solution.

Good Reads 51

Good Reads 51 a HUGE collection of hobby posts to enjoy

Welcome to Good Reads 51 where I share some awesome hobby posts from the last two weeks. With some painting tutorials, amazing miniatures, and awesome hobbyists, there is lots to check out.

Good Reads 51

Alternative Magnus the Red

Magnus the Red Conversion

Conversion and Painting by Rebecca

The plastic Magnus the Red is already an incredible miniature, so it takes some skill and creativity to convert it. Rebecca took up that challenge with this creepy alternative for their INQ28 campaign.

Painting a Blue Orc

Painting an Orruk face

Orc Tutorial by Darren Latham

Popping out of his shell to give us another incredible painting tutorial, Darren Latham wrote how he painted this blue Orruk Megaboss face. While not everyone will want their orcs to be slightly blue, the details around the ears, eyes, and mouth are useful for any orc/ork/orruk player.

Master of Change

Thousand Sons Tactical Squad

30k Thousand Sons by Mordian7th

As this is the third Thousand Sons army that Moridan7th has painted, and then sold  :-/, I think it is fair to say he knows a thing or two about the army. He is also a painted machine, and by the time of this post, he has already finished a few other squads!

Painting Miniature by Paul Bonner

Painted by Marc Masclans

For something a bit different, check out this HUGE tutorial/painting log by Marc on painting this minotaur in replication of a piece of art by Paul Bonner. While it may be hard to look at this and image that any of us could paint something like this, it is great to get an insight into these amazing artists and learn their thoughts and process.

The Red Hunters

Red Hunters Thunderfire Cannon Conversion

Red Hunters by Gothmog

Gothmog finished up his Red Hunters army Adepticon and they look awesome. With some clever conversions and lots of Death Watch bits, he kept the army in theme. He was also able to get it painted quickly with red washes over a silver spray.

Painting the Overlords

How to paint the Kharadron Overlords

Painting by Tyler

I’m not sure how Tyler managed to get a set of the new Kharadron Overlords early, but I’m glad he did. He not only painted up some great looking Pirate Dwarves but put together a great painting tutorial for his own skyport, Barak-Mor.

Creep Mine(d)

INQ28 Psychic Spore

Psychic Spore by Wilhelm

I’m not sure who started the creepy use of angel faces, but Wilhem put one to use for a Genestealer Cult Psychic Spore. It is not only very thematic for the Cult, but an incredible use of bits and paint.

Beauty in the Sand

Myersalome Diorama

Painted by Ana

This diorama by Ana is a beautiful use of colors and textures. She took a sculpt for Myersalome and turned it into an Arabian-themed sorceress. Lots of cool little touches throughout the miniature.

Lord of Decay

Converted Harbinger of Decay

Converted and Painted by Amy

Going in the opposite direction of royalty, Am wasn’t happy with the available model for the Harbinger of Decay. To remedy this, she converted her own to ride a nasty looking stead. Really cool conversion.

Van Damien’s World Devils

Van Damien's World Devils

Painted by Marc

There aren’t many reverse conversions of Ork vehicles back to their Imperial origins, but Marc needed a suitable ride for his Australian themed fighters.  Van Damien’s World Devils have been a passion project for Marc to celebrate his country’s fallen on remembrance day.

Wooden Spell Singer

Wooden Eldar Exodite Seer

Conversion by Alex

The Chapel Project has brought out many creative hobbyists, and Alex has recently added this Eldar Exodite Seer, the Gladesinger to the collection. A great mix of Sylvaneth and Eldar parts, and even a cool back story for her.

Demon Trees

Converted Sylvaneth Demon Trees

Demon Trees by NafNaf

NafNaf has started a new project, and I think you will agree his new Bog Sylvaneth conversions are incredible – if not nightmare inducing. All those textures really make the trees come to life.

Good Reads 51 Wrap Up

Wow, that was a big list! But I hope you were able to dig in and enjoy some of the Good Reads. Give them a follow and a comment.

Dwarf Blood Bowl Team the Golden Miners

Dwarf Blood Bowl Team Showcase

After a few last sprints, I have finally finished my Dwarf Blood Bowl team, the Golden Miners.  These were a great set of miniatures, and in many ways, a much nicer set than the start box models.

Dwarf Blood Bowl Team the Golden Miners

I’ll talk more about what I liked about this kit at the end of the post. I also linked the tutorials I’ve already put together for the team below. Let me know what you think of the team.

Dwarf Blood Bowl Team

Here is the whole Golden Miners team on the pitch.

Dwarf Blood Bowl Team in Yellow

The Dwarven Slayers are clearly the most dynamic set of miniatures in the set. You can also see that for this duo and the Blitzers below, the kit came with two sets of heads. You can’t argue with their beards though.

Dwarf Blood Bowl Slayer #12 Dwarf Blood Bowl Slayer #7

And here are those Blitzers. Clearly the heavy hitters of the team, they have a bit bigger armor plating and a hand guard bordering on a knuckle blade (no weapons in Blood Bowl of course!).

Dwarf Blood Bowl Blitzer #6 Dwarf Blood Bowl Blitzer #11

The final specialist on the team are the two runners. Yup, dwarves have runners. Not terribly fast, but they trade off some of their armor for an extra move point.

Dwarf Blood Bowl Runner #3 Dwarf Blood Bowl Runner #4

Filling in the rest of the team are the six blockers. Even though they are in sets of doubles, each looks dynamic and busy taking out an opponent. My favorite is the guy with the fist, clearly about to bring the hurt.

Dwarf Blood Bowl Blocker #16

Dwarf Blood Bowl Blocker #5

Dwarf Blood Bowl Blocker #15

Dwarf Blood Bowl Blocker #8

Dwarf Blood Bowl Blocker #2

Painting Tutorials

I’m not going to re-post the tutorials here, as I have already written about painting the team in two other posts.

For the yellow armor, the Dwarves were included in the How to Paint Yellow tutorial post. I used WarColours’ One-Coat Yellow and it is a life saver for painting this normally hard color.

Tutorial on How to Paint Yellow with layers, wash, and one coat paints

For the bases, I posted over on Rory’s blog, Stepping Between Games. The tutorial for the bases includes using Agrellan Badland for the broken ground texture and plenty of static grass. The article was written for the Orc players, but it is the same for the Dwarven Blood Bowl players.

How to Base Blood Bowl Players

Dwarf Blood Bowl Paint List

For the rest of the miniature, here is the paint list I used. Most of the colors were kept to a base color, brown wash, and a single highlight. I wanted to keep the models simple and quick so I could finally get around to playing a game with them.

Dark Brown Cloth:

  1. Model Color Burnt Umber (Mornfang Brown)
  2. Game Color Dark Brown Wash (Agrax Earthshade)
  3. Game Color Earth (Steel Legion Drab)

Light Brown Cloth:

  1. Game Color Bonewhite (Ushabti Bone)
  2. Dark Brown Wash (Agrax Earthshade)
  3. Game Color Bonewhite (Ushabti Bone)

Yellow Armor:

  1. WarColours One-Coat Yellow (Averland Sunset)
  2. Dark Brown Wash (Agrax Earthshade)
  3. WarColours One-Coat Yellow (Layer up to Flash Gitz Yellow)
  4. Game Color White (White Scar)

Dark Skin:

  1. Game Color Earth (Steel Legion Drab)
  2. Dark Brown Wash
  3. Game Color Leather Brown (XV88)
  4. Game Color Khaki (Zandri Dust)

Saphire:

  1. Game Color Magic Blue (Caledor Sky)
  2. Game Color Electric Blue (Lothern Blue)
  3. Game Color White (White Scar)

Base:

Again, check out the full tutorial on the base over on Stepping Between Games, but here is the paint list:

  1. Games Workshop Agrellan Badland
  2. Dark Brown Wash
  3. Green Flock, Static Grass, and Black Ballast

Thoughts on the Blood Bowl Dwarves

At this point, I have built the human, orc, and dwarf teams. I also have the Skaven team in the box. What I love about the kits so far is that each is different enough to reinforce the players’ race but similar enough to tie them all to Blood Bowl.

Dwarf Blood Bowl Team The Golden Miners

But of the four kits, the Dwarven players are my favorite sculpts. Perhaps it is because I haven’t owned any dwarves in the past, but the players are all very dynamic and have incredible details. My painting didn’t serve the details justice, but just the fingers alone show how far miniatures have come over the years.

One of the unique things about the Dwarf box is the two head options for the Slayer and Blitzer. All three of the other existing teams are identical pairs of players. Perhaps it was because the players are smaller and they had extra room on the sprues. But those two extra bits are awesome to help the team look different.

Next Up for Blood Bowl

Now that I have two teams fully painted, I am working on convincing the Mrs. to play a game. Perhaps it is because I have been away from a game store for so long, but I feel a bit intimidated to show up for a pickup game without knowing the rules.

So I plan to get a few practice games in first and see if I can find a local league (anyone from the east side of Seattle?).

In terms of painting, I am working on all the counters and balls which should be pretty quick. Then it’s on to the Skaven team. I then plan to buy/convert some of the special units for each race. A troll and/or goblins for the Orcs, a Rat Ogre for the Skaven, and of course the Death Roller for the Dwarves. I think that will be my second ever Forge World purchase 🙂

Brush Stroke 3 Banner

Brush Stroke 3

Another Brush Stroke from the archive, issue three continues the Mansions of Madness painting. With a lava skin tutorial, a Lorimar conversion, and tips on scraping mold lines.

Brush Stroke 3 Banner

Brush Stroke is the weekly newsletter of Broken Paintbrush, sharing the latest blog posts from that week as well as other great hobby posts from the web’s archives. This post archive’s last year’s newsletter. If you want to stay up to date, make sure to sign up in the form below.

Painting: Jenny Barnes

How to Paint Jenny Barnes from Mansions of Madness

This week I finished up painting Jenny Barnes from Mansions of Madness. I put together a tutorial for how I painted her pale skin and blue dress (including a downloadable PDF).

Painting: Laval Skin

How to Paint Lava Skin

Laval Gollum by James Wappel

When I started working on the Hounds of Tindalos, I came across James Wappel’s post on painting lava skin. It is amazing how he can put colors and layers together to create such amazing work.

Building: Lorimar

Converted Praetor

Lorimar by Kraut Scientist

Kraus Scientist is an amazing converter and decided to modify the already great looking captain from the Betrayal of Calth box. This ended up being his third version of his World Eaters leader. I enjoyed how he showed the progression of the bits and his thoughts along the way.

Building: Scraping Mold Lines

How to Scrape Mold Lines

Mold Line Demonstration by Dave G

Most of the modern miniatures are becoming so good that mold lines are almost a thing of the past, but my recent experience with the Mansions of Madness models show they are still a real thing. Dave put together an illustrative overview of the best ways to remove mold lines.

Inspiration: Good Reads 26

Good Reads 26

This week’s Good Reads included a Scott’s basing tutorial, Corm’s thoughts on hobby blogging, Jarrett expounding on Kings of War, Wilhelm’s Magos, and GunGrave’s tank. A full list of great articles.

Inspiration: Warhammer Quest Returns

Games Workshop is fulfilling their promise of bringing back their specialist games. This week they released a teaser video of the return of Warhammer Quest. Not much to it, but it looks to be yet another fan favorite.

Wrapup

Thanks for reading this archived Brush Stroke. If you found any of the articles helpful, could you pass along this newsletter to anyone else that may benefit from it? They can signup for themselves at brokenpaintbrush.com/newsletter or in the form below.

Object Source Lighting Tutorials

List of Helpful Object Source Lighting Tutorials

Whether it is a lamp, glowing lava, or a spotlight, adding the glow effect onto the model can look impressive. Many award-winning miniatures have multiple lights that appear to actually be glowing. I’ve gathered some articles with object source lighting tutorials so learn how to do this effect.

Object Source Lighting Tutorials

The term object source lighting (OSL) is what painters use to describe the illusion of a light striking the model. The painted on lighting effect can be dramatic, and sometimes overdone. But it is also tricky to achieve.

I have tried to do this effect on some of my miniatures with varying levels of success. But rather than try to create a tutorial on something I don’t fully get myself, I found articles by painters who have mastered the technique.

Light the Fire

Tips on using Object Source Lighting

Painted by Unknown on Chest of Colors

I couldn’t find who the author was for this guest post on Chest of Colors, but not only is this a beautifully well-done miniature, but the tips offered are great.

“C’mon baby, light my fire ” – OSL Tips | Chest of Colors

Seven ‘commandments’ are given on object source lighting, each with a short description of how they would affect the painting. Glazes are used for the larger areas, the darkest color of light. For smaller areas or the brighter color, glazes will run. So soft highlights are used instead.

Ron’s Glowing Power Fist

How to Paint a Glowing Power Fist

Power Fist by Ron of From the Warp

Ron was challenged to show how he would paint a glowing power fist after suggesting changes to someone else’s miniature.

Painting a Glowing Power Fist | From the Warp

While not everyone goes for the glowing fist look, he has some great tips on where the light would strike. Painting these colors up with lighter and lighter blues pulls off a nice effect.

His biggest three tips:

  1. It’s not a quick process.
  2. You need to be comfortable painting fine details and blending.
  3. It requires a basic knowledge of object source lighting.

Getting the Radius Right

Painting OSL Radius Correctly

Glowing Grenade by Ron of From the Warp

In another tutorial, Ron dives into getting the radius of the glow effect correct.

Painting a Glowing Power Fist Part 3 | From the Warp

In this tutorial, he highlights where the glow would actually reach on the model and the fading effects over distance. I love how he grabbed a spare mini to show how this effect would be done.

Raffaele’s Study of Light

Playing with light and shadow on face

Painting by Raffaele

The team at Massive Voodoo are no strangers to amazingly painted miniatures. Many include some incredible use of light and shadow.

Tutorial of Light and Shadow | Massive Voodoo

Raffa looks at different textures and materials and how they would act with various light sources. Adding some colored lights add more interest to the post and provides a nice foundation for other Object Source Lighting tutorials.

Massive OSL Painting Tutorial

Miniature with Subtle Object Source Lighting

Miniature painted by Roman of Massive Voodoo

Roman continues the conversation on Massive Voodoo with a look at different miniatures the team has painted and a small painting tutorial for the lady above.

Tutorial – Object Source Lighting | Massive Voodoo

What I like about Roman’s tutorial is that he leaves the lighting soft and subtle. Too often OSL hits us over the head with bright colors and hard transitions. He also has a great tip on where to place the light:

I think myself into the source of the OSL. Now I check the areas around me by looking out of the OSL source. Those places nearby will get attention by the OSL, others far away or not seen out of my little hideout will not be affected.

Dry Brushing Object Source Lighting

Painting OSL with Drybrushing

Painted by Anthony on LoUMP

While using an airbrush makes painting OSL easier, Anthony shows how it can be done quickly with a dry brush.

Tutorial: Quick and Dirty Tricks for Object Source Lighting | LoUMP

He also throws out a great tip for anybody concerned with giving object source lighting a try: varnish first. You can then use mineral spirits and a Q-Tip to remove errors. After adding a few layers green (dark to light) he gives the vials and brightest areas a wash to smooth the colors back together.

Easy Plasma Glue

Painting a glowing plasma gun

Plasma Gun by Xerothius

There is something about that soft glow of a plasma gun. Xerothius shows how he painted the glowing effect with different layers of paints.

Plasma Glow Effect (easy way) | Xerothius Model Painting

Not only is a cool trick to use the magnetized hand to attach to a drill bit, but he also talks painting the lightest colors at the ‘hottest’ part of the model.

OSL in Five Easy Steps

Painting Object Source Lighting with Airbrush

Scourge by the Eye of Terror

The Eye of Terror put together some nice illustrations for how he painted the weapon effects for his Scourges. Using an airbrush or a dry brush gives a nice effect before coming back in with a detail brush.

Painting OSL  Weapon Effects in 5 Easy Steps | Eye of Terror

The cool thing with this tutorial is he illustrates each point with a basic diagram. It is easier to see than the actual model while being practical enough to see how it would work.

Advanced Look at OSL

Advanced Object Source Lighting Tutorial

Slayer by Althai

The Hand Cannon gives a tutorial for painting OSL on this Warmachine Slayer.

Advanced Tutorial Object Source Lighting | Hand Cannon Online

Covering topics like how OSL effect is different on metallic and non-metallic paints and points like start with a darker model to provide more contrast. But I think it is summed up in his Cardinal Rule:

The Cardinal Rule of OSL: Areas hit by a light source must appear lighter than surrounding unlit areas.

Another tidbit of helpful tips: grab a colored LED and shine it on the model. This will help you get a sense of where the color strikes the model and how it effects the underlying paint color.

Wrap Up

I hope that this collection of guides to object source lighting was helpful. If you have any additional tutorials that have helped you learn this technique share them in the comments below. Also, if you have used the tutorials on one of your miniatures, add the picture below for us to see as well.

Learning from a paint & Sip

Learning from a Paint and Sip

Recently I went to a paint and sip with my wife and found it amazing that twelve people, mostly with no painting skills, all managed to paint a great picture. It got me thinking about how we could apply some of the techniques to our own painting and tutorials.

Learning from a paint & Sip

If you haven’t done one of these events, you show up to a room of empty canvases and a cool looking painting hanging at the front of the room. Each person takes a seat with a plate will the primary colors, white, and black paint, a couple of large brushes, and a cup of water.

Over the next hour or two, the whole group is walked through each step and brush stroke to complete that same beautiful painting at the front of the room.

This was the second of these type of events that I have done and I reflected on the remarkableness of it. I wanted to take away how the instructor was able to get so many people to accomplish works of art. I wanted to learn how to make my own tutorials better.

So below is five points that I took away from this paint and sip event. In each, I tried to distill what we can use in our own goals to improve our hobby skills.

Everyone Paints the Same Piece

One of the first things the programs do is simplify the process. Everyone paints the same picture. Some may have come wanting to paint flowers or maybe a sunset. But in only two short hours, no one would have learned or accomplished much.

Painting Mt. Rainer at a Paint and Sip

To relate this to our hobby, sometimes you should break away from the miniature you want to paint, and replicate the picture of a tutorial.  Attempting to replicate another style, another genre, or another range can help you break through a challenging color or concept.

Small, Easy Steps

During the painting session, the instructor took us through small, easy steps. She showed us the part of the sky we were about to paint and how to mix the colors for that area. Take a little blue and a tiny bit of black and make a line across here. Each section of the painting seemed easier and we were one step closer to a completed piece.

Have you ever looked at someone’s miniature and wondered how they ever got it completed? With so many details and color blending, and weathering there could be no way you would be able to achieve the same result.

Lots of small, easy steps.

Limited Color Palette

When we sat down at our easels, we didn’t have row upon row of paint jars with funny names. On our plates were blobs of green, blue, yellow, red, black, and white. Six colors to paint a mountain, hills, sky, and wildflowers.

Paint Palette

But it kept it simple for anyone who hasn’t used paints for anything other than school craft projects. There was no question of ‘which blue’ or ‘what shade of red.’ Sure, we had to mix colors, but even that was as simple as grab a bit of the blue and the white.

With the vast color selection in a single company’s paint line, let alone the dozens of lines we can choose from, it is easy to rely on finding the right bottle. I am very much guilty of not wanting to mix paints and would rather buy the whole Vallejo Game Color line than mix a few colors together.

Sometimes it is helpful to know that bottle of slightly purple blue will always be there when you are painting an army. You could paint a miniature ten years later and have it still match.

But it is also an easy trap to fall into. One of my takeaways from this realization is that I should not be afraid to mix paint to get the desired look. It doesn’t need to be the whole model, but details, highlights, and shading can all be made better with a bit of mixed color.

Take it Home

At the end of the evening, everyone got to take their painting home. It may not have matched the instructor’s artwork or even your neighbors, but it is yours. The sense of ownership and pride every time I walk by our paintings on the wall removes any fear of painting another canvas.

Taking the physical painting home removed the barrier of fear.

I didn’t just sit and watch someone else paint. I didn’t just dabble at a training session. I made art. I took that art home.

When you paint each miniature, you are creating a small piece of art and removing another layer of fear and doubt. Yes, it may not look like a Golden Demon winner or even a contender at your local game store.

But it is yours. Your accomplishment with paint and brush. From taking an empty gray plastic to life with color and character. So take it home and use it for inspiration for your next project.

Your Thoughts

Have you ever done one of these painting events? Either way, I would love to hear your thoughts on the event and my takeaways. Is there something that struck you or challenged you with your hobby projects?

Let me know in the comments below and let’s start a conversation about it.

Brush Stroke 2

The second newsletter, Brush Stroke 2 shares the start of my Mansions of Madness painting spree, tutorials on painting pale skin, and a look at the Golden D6.

Painting

Tutorial on how to paint zombies from Mansion of Madness

I finished the zombies from Monsters of Madness this week and even put together a tutorial. Oh, and I created a PDF version as well if you want to download it, please let me know your thoughts on it!

Spiky Rat Pack has transformed into the Iron Sleet, but in their backlog, they have an excellent tutorial on painting pale skin. A few more steps than my zombies, but an amazing result.

Photography

James Wappel shows us his new video recorder that he uses for live hangouts. Reviews the pros and cons of this cute little camera.

Hobby

The Big Mek give a list of 10 Things Beginners can Do to Improve, a great list of tips that some of us take for granted now, but invaluable when we were getting started and a great reminder of the basics.

Inspiration

The Golden D6 is a hobby e-zine written by fellow hobbyists, this week I wrote a Review of Issue #3 – where Adam was also kind enough to feature my Tutorial on Painting a Canifex.

Ever face down a whole army of gray and wishing you had the energy to finish it in a week? Well, Mordian has done it again, painted a whole heap of Thousand Sons in a single week, and they look great.

For some other great articles, check out this week’s Good Reads that includes four more articles from great hobbyists in the community.