Latest Posts

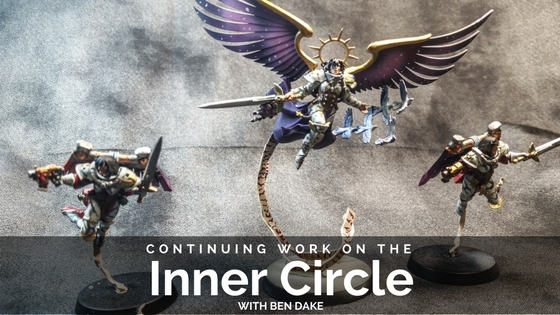
Continuing Work on the Inner Circle

Inner Circle Article Two: Electric Boogaloo

Hey there hobbymaniacs! Ben from Moosehead Studios checking in again to let everyone know the ups and downs and progress that I’ve made towards my goal of having 18 fully-painted units for the North American Games Workshop Inner Circle hobby event.

Continuing Work on the Inner Circle

But first, I have got to catch my breath. The time between my initial article and now has been quite the rush. Professionally, my school has gone through standardized testing (which is great for late-night hobbying), and I’ve also started spring training for my football time (not so great for late-night hobbying).

All-in-all, it’s been a positive experience so far, so let’s get some of the lower points out of the way.

Hobby Lows

Life, in general, has been much more hectic and crowded, as it always does at the end of the school year.  With work, my child’s activities, my family responsibilities, and maintaining a commission painting service, I sometimes don’t know which way is up, and my head feels like it is spinning.

I don’t think I’m unique in that, though. Anybody who has had multiple responsibilities has felt like this at some point.

Space Wolf Wyrdstorm Brotherhood

The positive effect of this is that I have become more efficient with my hobby time. I do very little extraneous or “just because” hobbying. Whenever I pull my chair up to my painting table, I have set goals to accomplish, and I simply don’t have the time to do anything that doesn’t help me work towards completing those goals.

I have also had to scale back some of my goals.  I am still painting (or at least I THINK I am) to a high standard, but in the interest of just getting everything DONE and ready for the competition (and subsequent tournament the next weekend), I’ve had to scale back some things.

They aren’t game-breaking changes, however. Originally, I had planned on fully magnetizing my Imperial Knight with all of the weapon options.

I still plan on doing that, but since I am not using it in competition, I am just re-painting and magnetizing the parts that I had already built.  I had planned on doing some dynamic basing for some of my models using spare building parts that I had sitting around.

Space Wolf Thunderwolf Cavalry

Nope. Not going to do it. Maybe further down the road, but not now.

It’s just not a priority, and it will take away from getting models completed.  I had also planned on having multiple pieces of ruins on my display board. I have scaled that back to just one big piece. It will still be dramatic and do the job it needs to, but by only having one building, I am saving time and re-allocating it to painting my miniatures.

Now, for the good stuff.

Hobby Highs

All of these compromises, however, have not diminished the quality of the work that I have been able to complete.  In the time since my last article, I have fully completed the following units:

  • Thunderwolf Cavalry
  • Wyrdstorm Brotherhood
  • Inquisitor Greyfax
  • Celestine’s Geminae
  • Imperial Knight

Which has made a significant dent in my overall total of completed units.  This has encouraged me that I can, in fact, paint to a high level of quality with a deadline fast approaching.

Geminae

Here is where I stand with just under a month left until competition:

Cawl’s Units

  • Cawl (nearly completed)
  • Archmagos (completed)
  • Skitarii Rangers (completed)
  • Skitarii Vanguard (still unbuilt, sadly)
  • Kataphron Destroyers (unpainted)
  • Kataphron Destroyers (unpainted)
  • Onager Dunecrawler (completed)
  • Skitarii Ruststalkers (unpainted)
  • Skitarii Infiltrators (unpainted)

Greyfax’s Units

Shadowfax

  • Inquisitor Greyfax (completed)
  • Blood Claws (completed)
  • Blood Claws (completed)
  • Thunderwolf Cavalry (completed)
  • Wyrdstorm Brotherhood (completed)
  • Wulfen (completed)
  • Wulfen (unpainted)

Celestine’s Units

Celestine and Geminae

  • Saint Celestine and her Geminae (completed)
  • Imperial Knight (completed)

And a bonus Gulliman of course.

Guilliman

Good Reads 50 with Hobby Blogs to Read

Good Reads 50 with painting tutorials, Battlefleet Gothic, and Orruks

Another week of Good Reads hobby posts for you to check out and enjoy. With painting tutorials and inspiration for your hobby needs. Check out these posts from fellow hobby bloggers and check out their sites.

Good Reads 50 with Hobby Blogs to Read

Remembering Battle Fleet Gothic

Revisiting Battle Fleet Gothic

A look at Gothic by Caladaris

I never got into Battle Fleet Gothic but it looked like a fun game, and with the growth of other ship based games I wouldn’t be surprised if Games Workshop brings it back. Caladaris dived into his collection and shared what made this game so fun.

On Commenting

Thoughts on Commenting by Morpheus

You may have heard me talking about the importance of community before as it is a big reason why I do this blog. Morpheus on The Fantasy Hammer shares his thoughts on commenting and why it can be so important in our hobby.

Using Lots of Washes

Nurgle Demon by Da Rednekk

I have been getting more into washes and glazes as they can not only be super fast to get a good look but add nice variation and color to parts of your model. Da RednekkBoss talks about the goodness of washes as he paints layer after layer on his custom Nurgle Demon Lord.

Massive Orruk Conversion

Massive Orruk by Jake on Ex Profundis

The Orruk Megaboss is a fantastic (not so) miniature, but Jake has turned his up to 11 by using the Ogroid Thaurmaturge body and resculpting his face. This is an excellent example of taking a vision of a model and crafting it together with bits and green stuff.

Thoughts on the New Dwarves

Image Copyright of Games Workshop

Love it or hate it, Games Workshop has done a lot changes since Age of Sigmar. Wudugast dives into these changes and discusses his thoughts on the new Overlords. With a mix of sorrow for the Old World and an excitement of what may come.

Librarian on a Move

Librarian with Jump Pack

Librarian by Cylde

Cylde’s Atlantis Warriors are a cool combination of green-turquoise and orange. He just finished his Librarian with a jump pack, and remarkably with an airbrush! It’s a cool mix of bits from Games Workshop to Anvil Industries.

Dynamic Pictures

Taking Dynamic pictures of miniatures

Dynamic Pictures by Blazmo

I’ve posted a few times on how to improve your photography skills for miniatures, but Blazmo shows us how to use a few pieces of scenery, lights, and angles to take dynamic images of our models.

Good Reads 50 Wrap-Up

I hope you enjoyed this week’s Good Reads and found something to inspire you or learn a new technique.

If you want even more hobby posts in your inbox every week, make sure to sign up for the Brush Stroke newsletter. Every week I collect hobby posts from the web’s archives and send them right to your inbox.

Tutorial on How to Paint Yellow with layers, wash, and one coat paints

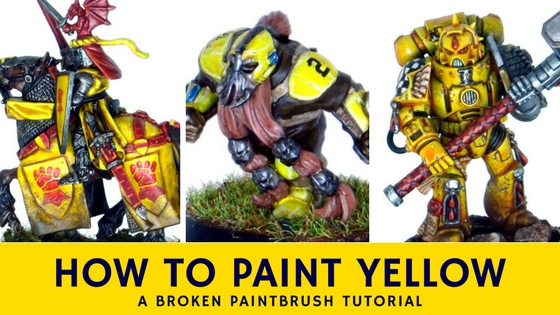
How to Paint Yellow – Three Techniques on Three Different Models

Yellow is one of those ‘hard’ colors. So, much like painting black, I stepped up to the challenge and created a tutorial on how to paint yellow. But not just one way, but three different methods to paint yellow.

Tutorial on How to Paint Yellow with layers, wash, and one coat paints

Mostly this tutorial was spawned by painting my Dwarven Blood Bowl Team with yellow padding. Since I wanted to try a couple of other techniques for painting yellow, I built a Bretonnian Knight and a Death Watch Space Marine.

Both of these other kits provides great opportunity to paint other colors. Well, at least if you don’t keep to the ‘standard’ Death Watch scheme.

So if you need some help or inspiration on how to paint yellow, check out the three tutorials below.

[convertkit form=5009797]

Using Layers to Paint Yellow on a Knight

I picked up a box of Brettonian Knights years ago to practice painting different colors and freehand.  And so far, I have painted only two of them! But Sir Sunshine here has provided the canvas for my first tutorial on how to paint yellow.

In this example, I used layers to paint yellow as that is the traditional way of painting. Start with a base coat, maybe a wash, and add lighter highlights. But yellow does not cover well and I will say, doing this example was a practice of patience as the mid-tone yellow took five layers to get good coverage!

How to Paint Yellow with Layers - Base Coat

I started with a primer of white paint and a base coat of all the colors. For the yellow, I used Game Color Plague Brown (GW Zamesi Desert). This is a yellowish brown that would work for the low-level shadow.

How to Paint Yellow with Layers - Wash

I then gave it an all over wash with Vallejo Brown Wash. This was mostly to provide shading to the rest of the model, but it also adds even more shadow to the yellow.

How to Paint Yellow with Layers - First Highlight

Using Game Color Sun Yellow (Flash Gitz Yellow), I painted layer after layer until it looked smooth. This is exactly why yellow is frustrating for so many painters as it was so tough to paint over the base layer. Straight out of the bottle, the thick yellow left ridges. Too thin and it wasn’t anything more than a glaze – and a terrible glaze at that.

But patience and persistence got me through. I realized later that I could have used Gold Yellow (Yriel Yellow) first as it would have provided a better transition. Alternatively, I could have mixed some of the Plague Brown in a well. It may have only taken four layers that way!

How to Paint Yellow with Layers - Second Highlight

The next layer of Model Color Moon Yellow (no clear GW color) was easier as I was only painting the highlights and ridges. I started emphasizing the folds in the cloth at this stage.

How to Paint Yellow with Layers - Third Highlight

The final highlight was a 50-50 mix of Moon Yellow and White. This was an extreme highlight that I thinned down with Airbrush Medium.

Finishing the Rest of the Bretonian Knight with Yellow and Red

From there, I painted the rest of the miniature, including his coat-of-arms. I used the decal from the Space Marine vehicle kit for the fist. I simply cut off the circle and painted over it with my reds.

To clean up the colors and add further shading, I added a carefully placed wash of brown. This was thinned down with the Airbrush Medium and used between each color area. I also added some of it to the folds of the cloth to add shadows.

Yellow Bretonnian Knight of the Realm

I finished up the base and added some mud to the bottom of the horse’s coat to match my first knight. A couple of coats of matte varnish and he was completed.

One Coat Yellow on Dwarves

For the other two techniques for painting yellow, I wanted to show how easy yellow can be.

This version involves using WarColours’ One-Coat Yellow which is a high pigment paint similar to Games Workshop’s Averland Sunset, but brighter.

The beauty of the One-Coat paints is that they will pretty much cover over anything. So on my Dwarf here, I painted the yellow last.

Using One Coat Yellow - Base Colors

You can see that most of the armor pads are still black with some paint splatter here and there. I wasn’t too careful with this first layer as I want to get all the colors in place and then tidy up.

First Layer of One Layer Yellow

You can see that after the one coat yellow, everything is covered up. On a few sections, I did need to use two coats but compared to standard yellow paint this was fantastic to paint right over black.

Brown Wash over One Coat Yellow

After that, I followed up with my typical Brown Wash all over. This is a magic elixir for getting quick results on your miniature. It not only shades everything nicely but provides an excellent separation between each color.

In many ways, this could be tabletop ready, and everything from here is gravy.

Highlighting Colors on Dwarf Blood Bowl Player

Once the wash was dry, I highlighted all the other colors. Since I am painting my Blood Bowl teams to a quick gaming standard, I only went with a single highlight on most of them. You can see the full paint list for painting the Dwarf Team here.

Re-apply One Coat Yellow to clean up

I then went over all the yellow with the one coat except for the deeper recesses of the armor. This cleaned up any extra wash and re-brightened it.

Highlight Yellow with White

And a final highlight of pure white. Again, these guys are meant to be a high-contrast gaming piece. So a pure white highlight adds a ton of pop without many layers. I kept the white only to the top edges of the armor.

How to Paint Yellow with One Coat Paints Finished

All that was left to do was add the decals, finish the base, and varnish him. From start to finish (not counting drying time) the dwarf only took about two hours to paint. This is pretty fast for me!

Painting Yellow with a wash on Lamenter

For the second, easy version of yellow, I wanted to paint with washes. I’ve seen many other painters get great results with using a wash straight over a white primer.

So I built up a Death Watch Space Marine to paint in the Lamenters Chapter scheme. I know that Death Watch is typically silver and black with only the right shoulder pad in chapter colors, but I like the idea of having them more colorful and only the left arm in silver.

I gave him a layer of white primer from the rattle can. In hindsight, I would have given him a second coat as the spray didn’t fully cover some areas where were visible in the final model.

Candora Yellow over White Primer

I then gave the whole model a generous wash of Games Workshop Casandora Yellow Shade. The bottle threw me off at first as the wet paint has an orange look to it. But it goes on with a nice yellow color and somewhat orange in the recesses.

Adding a second wash of Casandora Yellow

After a second wash, the yellow started to pop and give me the shade I was looking for. Be careful with each wash so that it doesn’t pool like it did on the inside of his left leg. Use an extra brush to wick away any extra wash.

Drybrush White Over Yellow

I wanted to do a third wash to deepen the yellow but wanted to keep the highlights. So I did a quick drybrush of pure white. This drybrush focused on the upper ridges of the model including the top part of the pad and helmet.

A Third Wash of Yellow Space Marine

The third wash turned all the dry brush work back to yellow and gave my Lamenter a solid look.

Painting the Lamenters Space Marine Details

I then went in and painted all the other colors. This was a nerve-wracking experience as I knew it would be hard/impossible to fix any mistakes. So I was careful with each brush stroke and made it through.

As another tip for when I do this again is to leave the silver arm off the model and paint it separately.

After I had finished all the highlights, I used a mix of Black and Brown washes mixed with extra Flow-Aid to create a dark pin-wash. Using a small brush, I added the wash to panel lines, rivets, and between colors. This helped provide better separation of color and deeper recesses in the yellow.

Lamenter Death Watch Space Marine Tutorial

From there, it was a matter of doing all the details and base. The chapter badge took a while, and I’m still not happy with it, but it gets the point across.

Wrap-Up

I hope that this tutorial has helped provide some pointers on how to paint yellow. Whether doing it with layers (and layers!), using a high pigment paint like the One-Coat, or with washes, painting yellow can be done.

After painting all three methods, if I were to do a whole army of yellow, I would use a combination of the one-coat and layers. The wash worked well but makes it hard to paint everything else.

A nice look could be achieved with One Coat Yellow, Brown Wash, highlight with mid-tone yellow, and then bright yellow. The One Coat gives you the speed while the wash and highlights would give you additional color range.

Do you have other tips on painting yellow? Gripes about certain shades? Let me know in the comments below!

Brush Stroke 1 - The Broken Paintbrush Newsletter

Brush Stroke 1

Exactly one year ago I started a newsletter for Broken Paintbrush called the Brush Stroke. The first few issues didn’t go out to many other than family, so I decided to post each week’s post here for posterity.

Want to get the latest newsletter into your inbox? Make sure to sign up in the form at the bottom.

Brush Stroke 1 - The Broken Paintbrush Newsletter

Welcome to the first ever Broken Paintbrush newsletter! I hope to bring new ways to help your hobby right to your inbox.


New Post: Foldio Review

Review of the Foldio 2 Photobox

This week’s post on Broken Paintbrush is a review of the Foldio 2 Light Box, a relatively large, but portable light box.

Photography: Build Your Own Light Box

Building a light box from cardboard

No longer a lawn mower box by Marc

But you don’t need to buy a light box, Marc from Old School Gaming built a huge one out of a lawnmower box.

Painting: Tutorial on Painting Eyes

How to paint eye

Reaper’s Guide to Painting Eyes

I’ve been working on improving my skin tones lately and stumbled upon a Reaper Minis article on painting eye first.

Inspiration: Warlord Titan

Painted Warlord Titan

Warlord painted by Dave Thomas

Dave Taylor is a long time favorite painter of mine, and recently he recorded his build and paint progress of his Warlord Titan, a very impressive kit painted beautifully.


I hope you enjoyed the inaugural newsletter and found the links useful. This first issue was a little light (and originally didn’t have pictures!). As I got into the swing of writing these weekly emails, I started adding more posts, and even quick hobby tips.

So if you want to the latest Brush Stroke, sign up below. Each post includes this week’s Broken Paintbrush posts but also helpful and inspiring posts from around the web’s deep archive. Know someone that would also enjoy the newsletter? Hit the share button or send them a link.

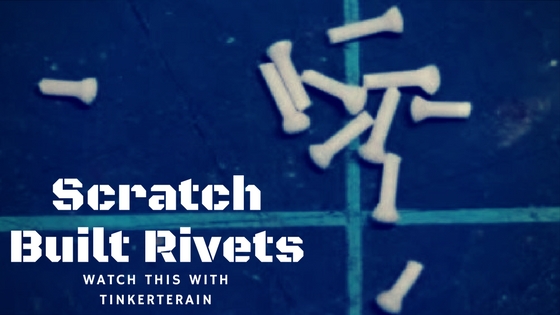
Watch This Making Scratch Built Rivets

Watch This: Making Scratch Built Rivets

For anyone scratch building a tank, or even modifying a section of 40k scenery, rivets are a common way to add interest to an otherwise plain sheet of plastic. But making hundreds of rivets can be a pain. This is why I like the TinkerTerrain’s tutorial on making scratch built rivets.

Watch This Making Scratch Built Rivets

In his video, he shows how he made nice looking rivets with a mechanical pencil and a candle. The video is only 5 minutes long, and he does an excellent job of showing each of the steps. For those who like to read on the go or want a quick cheat sheet, see my notes on the video after the jump.

Scratch Built Rivets with TinkerTerrain

Steps to Making Rivets

Preparation

  1. Grab a 0.9mm mechanical pencil and remove the eraser
    1. May need to drill out the end cap as well
  2. Insert 0.88mm rod from Evergreen or Plastruct
  3. Light a candle (note here on fire safety and breathing fumes of melting plastic!)
  4. Have a hobby knife on hand

Making the Rivet

  1. Two clicks of the pencil will push enough plastic through
  2. Hold it above the flame until the plastic softens
    1. too close and it will catch on fire!
  3. About half the length should melt back to create the rivet head
  4. Let the plastic cool for a moment
    1. Otherwise, it will deform when you cut it
  5. Another click to release more plastic
  6. Cut off the rivet with the hobby knife
  7. Repeat

Adding the Rivet to the Model

  1. Take your pin vice with a 1mm bit
  2. He didn’t mention it, but mark out your rivet lines
  3. Drill through the plastic
  4. Drop some plastic glue on a spare chunk of plastic or palette
  5. Use tweezers to grab the rivet
  6. Dip the rivet into the puddle and insert into the hole

Wrap Up

Did TinkerTerrain’s video inspire you to do some scratch building and add a few extra rivets? If so, leave your results in the comments below and let me know how it worked out! I’ll be doing some of this when I get around to building out my gaming table.

You can also give him a follow on YouTube for other videos.

Painting the Dwarf Blood Bowl Team

Painting the Dwarf Blood Bowl Team

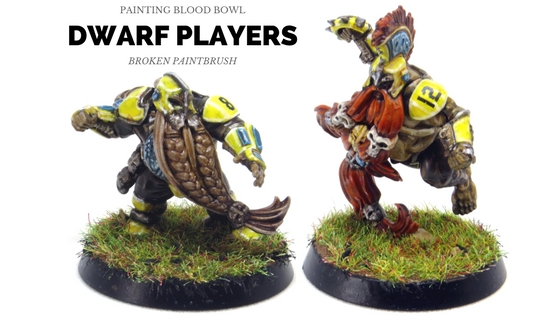
In my excitement to get a set of Blood Bowl teams finished, I painted up two of the Dwarf players: a blocker and a Slayer. Given they are a fantasy sports team, I used bright yellow and blue for their armor. Here is how I am painting the dwarf blood bowl team.

Painting the Dwarf Blood Bowl Team

As with my Orc team, I painted them to be quick so that I can finish the team quickly. Yellow would seem to be an odd choice for a quick scheme, but WarColours One-Coat Yellow made it simple.

You can check out the color list at the bottom of the post.

Dwarven Blocker

I love the look of the Dwarven Blood Bowl players. They are tough and squat but are distinct from mail-clad warriors. They also have a nice balance between ornate armor and flat panels for decals.

Dwarf Blood Bowl Blocker

The long beards and braids add movement and regalness to them even if their bellies hang out a bit.

Dwarf Blood Bowl Blocker Back

I attempted to paint the blue gems as sapphires, which I think worked out fairly well.

Troll Slayer

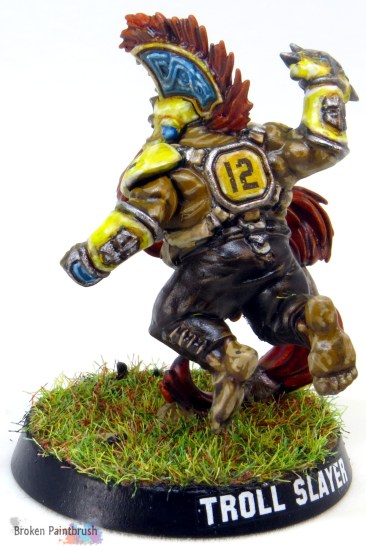
The Troll Slayer was a useful second trial model as he is more bared skin than armor. Also, with his long orange beard, I wanted to make sure the color scheme would work. To do that, I made it more red than orange.

Dwarf Troll Slayer Blood Bowl Player

I wanted to try a darker skin for the Dwarves, in part to contrast well with the yellow armor.

Dwarf Troll Slayer Blood Bowl Player

I am a big fan of how the sculptor used the slayer’s beard to give him some height and action.

Painting the Dwarf Blood Bowl Team

Below is the list of paints I used to paint the Dwarves. Most of the paints are Vallejo unless otherwise noted. I added the closest Games Workshop paint, or at least the color I would have used from their range.

Dark Brown Cloth:

  1. Model Color Burnt Umber (Mornfang Brown)
  2. Game Color Dark Brown Wash (Agrax Earthshade)
  3. Game Color Earth (Steel Legion Drab)

Light Brown Cloth:

  1. Game Color Bonewhite (Ushabti Bone)
  2. Dark Brown Wash (Agrax Earthshade)
  3. Game Color Bonewhite (Ushabti Bone)

Yellow Armor:

  1. WarColours One-Coat Yellow (Averland Sunset)
  2. Dark Brown Wash (Agrax Earthshade)
  3. WarColours One-Coat Yellow (Layer up to Flash Gitz Yellow)
  4. Game Color White (White Scar)

Dark Skin:

  1. Game Color Earth (Steel Legion Drab)
  2. Dark Brown Wash
  3. Game Color Leather Brown (XV88)
  4. Game Color Khaki (Zandri Dust)

Saphire:

  1. Game Color Magic Blue (Caledor Sky)
  2. Game Color Electric Blue (Lothern Blue)
  3. Game Color White (White Scar)

Base:

I wrote up the full tutorial on the base over on Stepping Between Games, but here is the paint list:

  1. Game Color Parasite Brown
  2. Games Workshop Agrellan Badland
  3. Dark Brown Wash
  4. Green Flock, Static Grass, and Black Ballast

Up Next

I now have 10 more dwarves to finish before moving on to the next team, though I am sorely tempted to get the Death Roller. A drunken dwarf lawnmower? Yup!

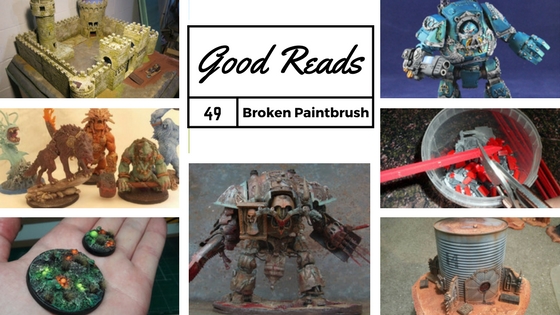
Good Reads 49

Good Reads 49

It is incredible to see what hobbyists come up with or the new projects they are painting. Good Reads is my attempt to showcase some of the favorite ones I found. I hope they inspire you with your projects and teach you a new trick or two.

Good Reads 49

DIY Terrian is Still Cool

DIY Terrain Build from Tin Can and Bits

Can Tower by Jack

Sometimes you need more line of sight blocking scenery pieces, especially with all those big guns out there. To solve this, Jack built up a couple of pieces from leftover cans and a few spare bits. Then with his usual impressive painting skills, he turned them into great looking pieces.

Coils of the Hydra

Alpha Legion Contemptor Dreadnought

Alpha Legion Dreadnought by the Gungrave

I liked how Gungrave’s Alpha Legion Dreadnought turned out. Between the charging pose and the fantastic metallic blue, it makes for a very nice looking Contemptor. The details pop with his paint job as well, showing off Forge World’s excellent sculpting.

Make Your Own Castle

Hirst Arts Castle

Plaster Castle by John

The dream of many fantasy gamers is to do a castle siege, reliving all those cool scenes from Lord of the Rings. John built himself a full castle for just such a purpose from Hirst Arts plaster casts.  The incredible amount of work to cast all those pieces is amazing unto itself, but his paint job is equally impressive.

The Knight Awaiting

Converted Knight Titan of Chaos in Blanche style

Victory Awaits by D Powers

I’ve posted D’s work before, but this Knight Titan, Victory Awaits, is just incredible. Between the creative and amazing conversions, to the Blanchian paint style, it is a horrible beauty to behold. Just take a moment and take in all the details this beast hides.

Monsters of Rage

Painted Miniatures from Blood Rage Game

Blood Rage Monsters Painted by Rory

I haven’t heard of the game Blood Rage, but the miniatures look fantastic, and Rory did an excellent job of painting the monsters from the set. Each is a mythical monster from Viking legend, and the sculpts and paint job fit each miniature.

Make Extra Rubble

Making rubble for scenery with cut up bits

Siph making a mess

Want to add some additional details to all the scenery you are building? Maybe show the boundaries of ruins or build up some barriers. Siph gives a great tip on using spare sprue and range rulers to make bricks and beams.

Overgrown Bases

Making jungle or alien bases with overgrown look

Overgrown base by Scar Hand Painting

For an alien or jungle look, this tutorial by Scar Hand Painting is fantastically simple. He uses an odd, but very effective technique to combine white glue and super glue for the distorted earth look. With a few well placed seeds and spheres, it becomes alien very quickly.

Blood Thirsting with Friends

Adding Bloodletters to a Bloodthirster base

Bloodthirster by Spot1cus

Multi-wound models can be difficult to keep track of damage during a game. Dice placed for markers often get picked back up while random tokens can look out of place. Spot1cus solved this for his Bloodthirster by using extra Bloodletters on the base. As the greater demon loses wounds, Bloodletters are removed until he is all that remains!

Painting the Rat Pack

Painting the Skaven Blood Bowl Team

Skaven by Stahly

I’ve been excited about Blood Bowl since its release, in part because each team is a contained set of miniatures. For this reason, painting tutorials like Stahly’s Skaven Team are on my save list. It is a long tutorial but produces great results.

Painting Hazards

Painting Hazard Stripes

Hazard Stripes by Table Top Teacher

Yellow and black chevrons can add a blast of color or add to the miniature’s story. But they aren’t the easiest things to paint. The Table Top Teacher gives a great tip on how he paints his with a foam brush.

Monsters Marched

Monster March Painting Challenge

Monster March has officially concluded for the year and Sword Master posted the final results of the participants. The monsters look awesome and it is exciting to see events like this being hosted by bloggers.

Wrap Up

I hope you enjoyed this week’s set of posts for Good Reads 49. Hit up each of the bloggers and give them a follow. If you like getting a dose of hobby blogs in your inbox every week, make sure you join my newsletter, The Brush Stroke. I dig through my collection of saved posts for some real gems and serve them up with the latest posts from Broken Paintbrush.

Preparing for the Inner Circle Hobby Challenge with Ben Dake

Preparing for the Inner Circle

Hey, guys and gals! Ben here again from Moosehead Studios. In this series of articles, I won’t be offering advice on how to paint, but instead, I will be documenting my journey of preparation for an event, specifically a hobby-centered event.

Preparing for the Inner Circle Hobby Challenge with Ben Dake

When I got back into the hobby four years ago, I openly said that I only painted for myself, and would never paint for competitive purposes. File that, along with airbrushing and commission painting, under “Times I’ve Had to Eat My Words.”

The Holdups

The problem for me, up until this year, has been the fact that most of your big painting contests were held at competitive tournaments. Which, as much as I would love to compete in them, I have never been able to because I have an extremely limited hobby budget. I could never afford what I thought I needed for a competitive list. I played mostly with models that I have had on hand for nearly a decade and re-painted, or the few models I could acquire throughout the year as gifts.

Hardly the pace needed to keep up, much less field, a competitive army.

Life Changes

And then this year happened. My commission painting business took off. All of a sudden, I had disposable income for the hobby. I could keep up.

After a mandatory upgrade of my painting set-up and an accumulation of some money, I began to plan out what I would bring for a tournament. This was also during the release of the miniatures for The Gathering Storm series of books, which as an Imperial player, presented me with some powerful units right out of the gate: Celestine, Cawl, and Greyfax.

It didn’t hurt that the models looked fantastic, either. I also bought some Horus Heresy Space Marines because, again, they just look so darn good.

So after some playing around, I settled on a list that I thought was competitive and that I owned most of the models for, which was uncharted territory for me. And once I finished painting Celestine like this, I knew she had to be a focal point for my army:

Saint Celestine by Ben Dake

I don’t live near a gaming store. The two closest ones are an hour-long drive for me. I drove to the Warhammer store in Huntsville, AL for the express purpose of buying a pack of Wulfen to complete my Murderpack after meeting a friend for lunch.

The staff there knows I love to paint as well as game and asked if I had any pictures of what I was working on. I showed them Celestine. They gave me a packet for the Inner Circle Event and explained how it would work, and what would happen if I finished in the Top 5.

A trip to Dallas was too tempting.

Read the Rubric

I got home and began to pore over the attached rubric. I could do this! Doing some quick math in my head (which is harder than it sounds because I’m an English teacher by trade and training), and I thought I could achieve a pretty high score.

If you want advice from this, this is the first bit I can give you: whatever event you are planning to enter, they will more than likely have a scoring rubric. Read it. Go over it, repeatedly. Game Plan for it. If they are giving points for X, Y, and Z, make sure you do X, Y, and Z so you can maximize your score.

Whatever event you are planning to enter, they will more than likely have a scoring rubric. Read it. Go over it, repeatedly.

This, I might add, is also the cause of a ton of hobby stress for me. To maximize, I have to have 18 different units. I have the 18 units, don’t get me wrong, but most of them are unassembled and/or unpainted. Did I mention this event is on May 13? And to maximize, I have to have units of 10 (or more in some cases).

Oh boy.

My Inner Circle List

Anyway, here is what I decided on for the Inner Circle event. I’m centering my narrative around the Triumvirate of the Imperium, and dividing my units up between the three models:

Bellisarius Cawl’s Units

  • Tech Priest Dominus (painted)
  • 10 Skitarii Rangers (which I have written about for this website)
  • 10 Skitarii Vanguard (unassembled)
  • Two units of 3 Kataphron Destroyers (assembled)
  • Onager Dunecrawler (painted)
  • 5 Sicarian Ruststalkers (nearly painted)
  • 5 Sicarian Infiltrators

Inquisitor Greyfax’s Units

(In the narrative, these all came from Trazyn’s collection like she did)

  • Two units of 5 Wulfen (half are painted)
  • Two Units of 15 Blood Claws (unassembled)
  • 4 Thunderwolf Cavalry (unpainted)
  • Wyrdstorm Brotherhood on bikes (getting a quick re-paint to match everything else)

Celestine’s Unit

  • Imperial Knight of House Terryn (unpainted)

On top of all this, I have to build a themed display board (more on this in my next installment). Wish me luck folks!

How to Improve Your Hobby Skills Through Showcasing

How to Improve Your Hobby Skills Through Showcasing

Want a quick tip to improve your miniature painting skills? Post pictures of it for the world to see. No joke, this has been one of the best drivers for me how I improved my hobby skills: through showcasing.

How to Improve Your Hobby Skills Through Showcasing

This is part three of my series on improving your hobby skills. You can download all three parts into a single eBook by filling in the the form below.

[convertkit form=5003522]

Improve Your Hobby Skills Through Showcasing

You may think it’s odd that I would add a suggestion for showcasing your model as a way of developing your hobby skills. But it comes down to this: community feedback and incentive to improve.

With very rare exceptions, we have a very warm and encouraging community of hobbyists, and if you post your progress and ask for help, more than likely some of us will find you and encourage you to keep it up. I know because that is how I pushed myself to improve and keep at it.

This final post in my series focusing on improving your hobby skills will emphasize the following topics:

  • Photographing your miniature
  • Editing the pictures
  • Sharing them online

Many of these are simple techniques you can start using today to take better pictures of your miniatures and join the online community. So skim through the topics, find a few that interest you, and try them out.

Photographing Your Miniature

This first section will focus on improving your skills on miniature photography. While I have a post full of tutorials, this section condenses much of that information down into easy to follow steps.

Use a Backdrop

Too many times I see posts of nice looking miniatures upon a cluttered desk or in front of a computer screen. The noise detracts from the model and viewers skip right by. So let’s start by looking at backdrops.

Simple Sheet of Paper

A simple sheet of paper leaning against a wall or box is a great improvement with minimal effort. If you let the paper bend without creasing, it creates an invisible transition from tabletop to the background. Place you mini in the middle of the flat area and take your picture.

Need a bigger background for tanks or armies? Grab a poster board for less than a dollar – just remember to use the back side as it won’t shine like the glossy front side.

Photography Backgrounds

If you want to up the game, you could get a fancy background from somewhere like Hangar 18. These provide an interesting image without the distraction. You will want to think about the colors of your army and what would look good behind them.

Picking a contrasting color can provide more pop, but too much contrast creates the same noise problem as a cluttered desk.

Background in Foldio 2 kit

You can also use plain colored backdrops like black, gray, or blue. Many miniature photography kits come with a selection of basic colors to use. They may even include a green screen if you want to add some photoshop background!

Add Proper Lighting

Next up is making sure your mini gets enough lighting to show off the details and reduce camera blur. With more light bouncing off your model, the faster the camera can capture it, the less chance for moving it and causing blur.

Using Daylight

A great way to get lots of lighting on your miniature is to use actual sunshine. Place your miniature and backdrop, so the light hits it from the front. Double check to make sure you don’t provide a shadow.

Using Lamps

An easy way to get more consistent light is grabbing nearby lamps and place them in front of your model. Adjustable arm desk lamps work well as you can move them to help paint and then swivel over to your photo area.

Using extra lights with Foldio 2

You could even use a couple of clamp-on spot lights like these that I found at Home Depot for only a couple of bucks.

Notice how the three lights are hitting the model in my photo box? The LED string from the Foldio is from the top front. While the two lamps are lower front from each corner. This provides good light coverage on the model and reduces the shadow.

Daylight Bulbs

Regarding what lights, many people point to ‘daylight’ bulbs which are halogen or LED bulbs that are truer white than traditional yellow-hued bulbs. Since these bulbs provide light closer to white, it doesn’t change the color of your model.

The white color also helps with the automatic white balance on your camera.

Diffusion Paper

If you are finding that you are getting too much glare off of your lamps, you need to diffuse it a bit. You can pick up a pack of diffuse paper from Amazon and tape it to the lamp or grab some sheer cloth and throw over it for now.

Even a piece of paper can help reduce the glare while letting plenty of light through. The diffusion helps the light to bounce around a bit so that it hits the model from different angles.

Learn Your Camera Settings

One of the myths of miniature photography is that you need a big fancy camera to get good shots. Sure a nice DSLR and a big lens can capture things your phone could never dream of, but it can get the job done.

For all of my photography, I use a simple point-and-shoot camera or my phone.

What is more important than a fancy camera, is knowing how to use the camera. I’m not going to go into depth on all the settings, but you can check out a couple of tutorials here. The gist is that if you set your camera to macro mode (the flower icon), use the delay timer, and, ideally, use a tripod your pictures will turn out much better.

Macro Mode

Selecting ‘macro’ mode on your camera is done by selecting the flower icon in its settings. This tells the camera to focus on things that are closer to the lens, such as your mini. For camera nerds, this is done by opening up the aperture to shorten the focal length.

For the rest of us, this mode helps the camera use its auto-focus on objects closer to the lens, capturing the details of your model.

Zoom

To get the best picture as possible of your miniature, you want to have it fill as much of your picture as possible. While you can later edit the image by cropping out the extras (more below), you still want to start with as high of resolution image as possible.

But you should only use the optical zoom options of your camera as the digital zoom is nothing more than pre-cropping the image. So cell phones are stuck at moving the phone closer.

Place the camera about a foot away from the miniature and zoom in as much as the auto-focus will allow. If you are using the macro mode, some cameras will automatically disable it if you zoom too much. Instead, find where you can fill the image as much as possible with your miniature, but still have it focus.

Delay Timer

A blurry image can ruin any chance of showing off your model. Often the blur is the camera out of focus with the miniature but may be due to you shaking the camera as you press the shutter button.

Using macro mode can help with the focus and a tripod with the shaking, but using the delay timer can eliminate the camera shake. Usually, this delay timer is used for group shots so you can hit the shutter button and run to join the group.

If you set it to the lowest value, you can get everything set up, hit the shutter, and brace your hands while it counts down.

Use a Tripod

Basic Camera TripodWhether it is a floor standing tripod or a small Gorillapod, a tripod will hold the camera steady as you take the pictures. This not only helps to reduce the camera shake but will also allow you to adjust the miniatures around until they fit well within the image.

You could pay a lot of money for a quality tripod, but we only need a steady platform. So the Amazon Basics tripod works perfectly without being expensive.

F-stop and ISO Settings

Advanced techniques will have you adjust the f-stop and ISO settings which allow more light and increase the depth of view. So the sword pointing out is in focus as well as the character behind it.

To change these settings, you often have to be in manual mode on your camera. See your camera’s manual on how to adjust these settings.

Once you have your miniature, lighting, and tripod all set up, adjust the ISO settings until the miniatures are bright but not washed out. A higher ISO number will allow more light into the camera, creating a brighter image. But if you let too much light in, the details and brighter areas loose crispness.

fir0002 / flagstaffotos; derivative work by Autopilot (modifications: merged Jonquil_flowers_at_f5.jpg and Jonquil_flowers_at_f32.jpg)

Comparison of f/32 (top-left corner) and f/5 (bottom-right corner)
From Wikipedia

F-stop setting changes the depth of focus that the camera can capture. For single miniatures, this value may not be as important, but for groups or large miniatures, increasing the f-stop will allow for more models to be in focus.

You will want to set this number to be as high as possible to allow as much of the miniature to be in focus. But as you can see from the pictures of flowers, a dramatic battle scene could be created by keeping the background somewhat blurry.

Photo Editing for Miniatures

With Instagram becoming more popular in our hobby, many have already used simple photo editing with filters. I break it down into two steps: cropping and color adjustment.

Simple Editing with GIMP

Basic Photo Editing using GIMP - Header

I will do a quick overview of both, but you can check out my post on editing with GIMP here. This is the free tool I use to quickly edit all of my pictures.

Cropping

Cropping is where you cut out all the extra parts of the image. This is important since basic cameras can only zoom in so far. Cropping the picture takes care of the rest. I like to crop down as much as possible on the miniature as it provides the best look on the blog.

GIMP Tutorial - Cropping

Depending on what you are trying to highlight in a particular image, you could even crop out parts of the miniature. A good example of this is if you want to show the model’s face. Cropping down to just the head helps show the details of the face better and allows your viewers to see what you are discussing.

White Balance

The second edit you can do to the pictures is to adjust the color. By this, I don’t mean to ‘paint’ in things that don’t exist, but rather correct wrong white balance from the camera.

This correction is even more important if you don’t have adequate lighting or using a basic camera. But it is also easy to overcome as ‘Auto Balance’ often gets the job done.

Using Auto White Balance

Even with good lighting, digital cameras can get confused as to what ‘white’ is and can turn the image blue or yellow. Using auto correct in your image editor of choice will often fix this as well as bring out more of the color.

Advanced Editing

Between cropping the image and using auto balance, you already have a huge leg up on improving the look of your photographs. If you want to learn more advanced editing such as color control and to remove the background, then read my Advanced Photo Editing post.

App Filters

Artistic edits with filters in Instagram or other apps can be easy alternatives to GIMP or Photoshop. The tool can crop down the image and the filters can not only provide white balance options but also change the mood of the picture.

By changing the mood of the image with blue or red tints, you can provide a more dramatic feeling. This is perfect for in-game pictures or narrative shots. The gray tone filter is also popular with work in progress shots as it helps focus on the look rather than the unpainted plastic and green putty.

Share Your Pictures

Speaking of Instagram, posting your images to social media is a great way to get feedback with minimal setup. There are a ton of other hobbyists that create accounts specifically for their hobby work so you can fill your feed with inspirational posts rather than someone’s dinner.

While I am not active on all the different social media platforms or forums, I try to talk through each for you here. Find one that fits your preferences and join the community there.

Twitter

TwitterFor interaction and hobby dialog, I would recommend Twitter. It is the one I’m most active on and has an awesome community. The ability to post picture and text updates means you can share pictures of your miniatures and join in conversations.

If you use the hashtag #warmongers other hobbyists can find you and will comment with recommendations if you need help. Post finished minis on Mondays with #miniaturemonday and WIP pics with #wipwednesday to quickly get found.

Instagram

InstagramInstagram is great if you like seeing pictures, but it doesn’t provide much in the way of interaction. It is simple to get started in that you upload a photo, give it a description, and include some hashtags. The hashtags basically categorizes the picture so others can find it. Start with #paintingwarhammer and go from there.

I use Instagram for inspiration or when I have a spare moment or two and want to get a quick hobby fix. But I rarely see comments on pictures or conversations.

Facebook and Google+

FacebookFacebook and Google+ both have many subgroups with active members including the 1houranight on Facebook and the 40k group on G+. Post your progress or questions and fellow hobbyists will reply with their feedback.

The Facebook group Miniature Painting Tips And Tricks. Showcase And Share Your Secrets has all sorts of artists and hobbyist posting helpful articles or picture tutorials.

Both of the communities provide a nice mix of pictures and conversations.

Blog

The next level of showcasing your miniatures is writing your own blog. This provides the ultimate level of control with how you share your pictures and what you write. But it is the hardest path.

You can get something set up for free at Blogspot or WordPress.com fairly quickly. From there it is as simple as writing posts and loading pictures. To build a reader base, check out the collection of tips for hobby bloggers and just keep writing.

Wrap Up

To sum up this whole post: get your miniatures out there for the world to see and join the community. Seek feedback from others and learn from their responses. By putting your work out there, it can provide a big motivator to try new techniques and improve your painting.

If you have other tips for improving your ability to showcase your minis, leave them in the comments below.

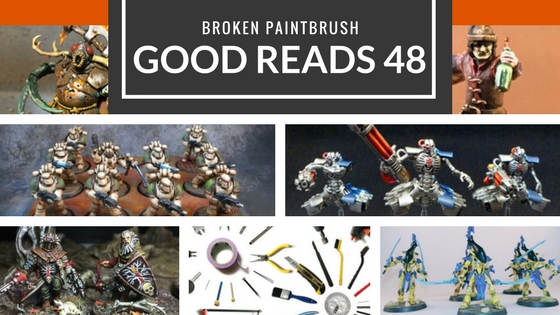
Good Reads 48 of Broken Paintbrush

Good Reads 48

Skip scrolling through the blog feed for a minute and check out this week’s list of Good Reads. I’ve collect some of the posts that have caught my eye over the last two weeks and gather them here for you to check out, catch up on if you fell behind, or maybe find someone new to follow.

Good Reads 48 of Broken Paintbrush

With that, here is Good Reads 48.

Seeking Guidance

INQ28 Chapel Miniatures by Alex

Inq28 Models by Alex

Alex has joined in with The Chapel project to create a unique mix of backwoods clans in the 40k world.  This is his second Ostium Guild for the event and not only did he make these two incredible miniatures, but a great short story to go with them as well.

Necron Destroyers

Necron Destroyers with Blue Armor

Necrons by Siph

Siph has just completed his third unit of Necron Destroyers with a nice looking half-field of blue. Combined with his Destroyer Lord he now has a Destroyer Cult formation to wipe out his enemies.

AoS28 and Warhammer Quest

Warhammer Quest Bray Shaman for AoS28

Bray Shaman by Crimson Oracle

AoS28 is picking up momentum and Crimson Oracle has combined it with his interest in expanding Warhammer Quest with a new set of monsters and tiles set in a swamp. Some great looking work going on there.

Death Guard Kill Team

Death Guard Kill Team for 30k by Greggles

Death Guard by Greg

Greggles has been kicking it into high gear to get ready for AdeptiCon and finished this Kill Team of Death Guard for the event. It’s a fantastic balance of color, uniformity, and weathering.

3D Printed Heros

Heroforge Bard 3D Printed hero for DnD

3D Printed Bard Painted by Tibbs

Jeff painted this 3D printed bard from Heroforge for a friend and now only showed off his great skill and color choices, but also how he fixed the issues with the printing process. Still a ways off from putting companies out of business, but the quality is getting better.

Tools for Terrian

Tools for building terrain

Tools of Dagger and Brush

Having the right tool is critical for getting work done efficiently and with quality. Dagger and Brush share their tools for building terrain which is worth paying attention to if you have seen the amazing terrain sets over there.

Wraithblade

Weathered Wraithblades of Iyanden

Wraithblades by Spot1cus

When the new Eldar Wraithlords came out with the Wraithblade variant it was a cool addition to an already nice model. Spot1cus painted his in Iyanden colors, but took the fluff and painted them with a darker mood and added weathering – something you don’t often see on Eldar.

Wrap Up

That was another big set of posts to check out, I hope you found something to satisfy your hobby itch and maybe even learn a few things from your fellow hobbyists.

With this week’s post, could you do me a favor and share it with a friend or two? You can click the handy social share buttons below or just send them a link. I would love to have more people check out these great posts above.

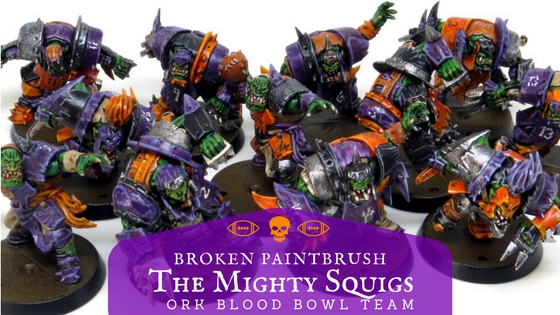
The Mighty Squigs Ork Blood Bowl Team

Orc Blood Bowl Team Completed

While I didn’t finish them for Squaduary as I had pledged, I finally finished all twelve of the Orc Blood Bowl players of The Mighty Squigs. Who says you haven’t seen a purple orc!

The Mighty Squigs Orc Blood Bowl Team

As I currently don’t have time for games of 40k, I find that board games have been easier to get the family involved. Blood Bowl fits this perfectly. I think I could even talk my dad into a match since he is a huge football fan.

When it came time to which team to paint first, it was simply a matter of which team looked like more fun. And what is more fun than orcs? (though I keep wanting to spell them orks!) Whenever I start a new faction, I look at what colors I haven’t painted and what would look good on these models.

I hadn’t painted any armies with purple, and I figured they would look pretty good on an orc’s green. Armed with my handy color wheel, I found that to finish the complimentary color trifecta I needed to add some orange as well.

With all of that, I present…

The Mighty Squigs Orc Blood Bowl Team

Ork Blood Bowl Team painted Orange and Purple

Since I didn’t do anything to modify the second half of the team (each set is six duplicates), I painted one-half with more purple and the second with more orange. As a full team, they provide a nice block of color, without being overly bright.

Black Orc

Black Orc for Blood Bowl Team

The Black Orcs were left a little darker than the other orcs to fit their rank, and their extra bulk is noticeable in these models.

You’ll notice, I didn’t pay too much attention to which areas were purple or orange on each set as I painted them entirely separately. I wasn’t focussed on being completely different, but rather have one lean more purple and the other orange.

Orc Blitzer

Orc Blitzer from Blood Bowl

The Orc Blitzers are fun models as they have a lot of movement and the facemask looks cool on them.

Orc Linemen (lineorc?)

Blood Bowl Orc Lineman

The three set of linemen are not as exciting, but they are still cool looking models. I like how they took the feeling of an orc and combined it with traditional football. Completely impractical, yes, but full of character.

Lineman for Ork Blood Bowl Team

I used the numbers from the orc decal sheet, and I placed the two large numbers on the skulls on the front and back. The third, smaller decal was placed somewhere else on the model. Sometimes one the thigh armor, shoulder pad, or even wrist blade guard.

Each was then weathered down a bit to make it fit in. The white decals were painted over with Bonewhite (an off white), and the base color was dotted and scratched into each number.

Line man for Orc Blood Bowl Team

While the team is two sets of duplicates, they are great miniatures. Between how the armor is layered differently on each model, to the details in the face, each provides a story of its own and fits the position it is meant to fill.

Orc Thrower

Blood Bowl Orc Thrower

The thrower is a great example of this. He has much less armor than the other players, with only plates on his front facing side. Instead, he has a flowing sash and loincloth that hints at traditional quarterback’s towel.

Painting the Orc Blood Bowl Team

I had meant to create a full painting tutorial of the orc team but didn’t end up taking enough pictures as I went. Part of this was because I was painting upstairs on the couch, but I also wanted to get them done.

So instead, I will have a rough painting guide for how I painted the team and the color reference list at the end (with Vallejo and Games Workshop paints referenced).

Blood Bowl Orc Team Work in Progress and Painting Guide

I started by painting all the base colors over the model and giving it a wash of Vallejo Dark Brown. Not only does this give me a sense of overall color balance, but also makes it easier to highlight. As the wash separated each color area, it is easier to see the edges.

I used Dark Green for the skin, Hexed Lichen for the purple, Hot Orange, Leather Brown, and Khaki, Black, and Gunmetal for the rest.

Painting the Orc Blood Bowl Team

I used a combination of edge highlighting and painterly-style lines to highlight each area. By painterly-style, I mean that for the flat surfaces I added a few extra lines and details to make it look interesting. I wasn’t going for a smooth color. But rather something that would pop at a distance.

The finished miniatures have an extreme highlight that works well for my style and showcase the excellent details of the miniature.

The colors I used were:

Orc Skin

Game Color Dark Green -> Dark Brown Wash -> Game Color Sick Green -> Game Color Camouflage Green

For the mouth, I used Game Color Gory Red and Model Color Brown Rose. I brought some of the paint up the lips and before highlighting with Camouflage Green.

I painted the teeth with Game Color Khaki -> Game Color Bonewhite with a touch of Pure White highlights.

Purple Armor

Game Color Hexed Lichen -> Dark Brown Wash -> Citadel Genestealer Purple -> Game Color Sombre Gray.

While I have the whole kit of Game Color paints, it doesn’t come with a good mid-tone purple. So I went back to GW paints, and Genestealer Purple worked perfectly. The Sombre Gray provided a nice cool-tone extreme highlight.

Orange Cloth and Armor

Game Color Hot Orange -> Dark Brown Wash -> Game Color Orange Fire -> Game Color Gold Yellow

On the armor areas, I highlighted with Game Color Gold Yellow while the cloth areas I used Game Color Khaki mixed with Gold Yellow. This provided a softer look to the fabric, more worn looking than shiny.

Black Cloth and Armor

Game Color Black -> Game Color Cold Grey

The lighter gray is a bit of a harsh highlight, but since black is a minor color, it wasn’t as important to be ‘right.’

Brown Cloth (light and dark brown)

I used  Game Color Leather Brown ->Dark Brown Wash -> Game Color Khaki on the tThe dark brown cloth.

And painted the light brown Game Color Khaki -> Dark Brown Wash -> Game Color Bonewhite.

Up Next For the Team

Since I plan for this to be a family game, I need to build up a few teams for everyone to play. So not only do I have the human team from the starter set, but also the dwarf and Skaven teams on my work bench.

Yes, this means that the Stompa and INQ28 teams are on the back burner, but I will get done soon I promise!

One of the things I want to do with each team is adding the race’s unique flavor. So for the orc team, I had planned on converted a river troll, but after talking with Thor, I think a few goblins would be better additions. I need to pick up a box of the little guys and hack in some padding/spikes.

The Saphire Smashers

I have also started the dwarf team with some rough work in progress trial miniatures.

Dwarf Blood Bowl Team Work in Progress

The dwarves are bright yellow as I just bought WarColour’s One-Coat Yellow and wanted to give it a try. First impressions: this paint will change how you paint yellow. No joke, it covers well. Even over the black primer it only two coats to look bright and smooth.

As the spot color, I’m going with a brilliant blue and thinking of Saphire Smashers as the team name.

The two miniatures above are all base colors and a wash of Dark Brown which is why is looks so rough. This helps me figure out if the colors I chose for each area is going to work. For example, I plan to paint their skin as a mid-tone brown and their pants a dark brown. But at this stage, they look too similar, and I will need to push them further apart.

Once I finish the Dwarf team, I plan to do all the bases. In part, so they are consistent, but also I don’t know how I want to do them yet. A beautiful grassy field? Mud and turf?

Thoughts on Why Do We Hobby Blog

Why do you Hobby Blog?

The people who paint miniature wargames is relatively small. And those who choose to take the extra time to write and share pictures is even smaller still. To these, I ask the simple question: why do you hobby blog?

Thoughts on Why Do We Hobby Blog

Last week I posted this question: “Why do did you start  your hobby blog, what motivates you, and what frustrates you.” I wanted to get a sense of why others choose to write and share their work. And what keeps them going.

Below you can see some of their responses. I also added my thoughts about why to start blogging about the hobby, frustrations along the way, and ways to stay motivated.

Reasons People Start a Hobby Blog

I started what is now Broken Paintbrush in 2008 as a way to log my painting progress of my Iron Warriors. With no idea what I was doing, how to find other hobbyists, or how I “should” blog. I just started writing and posting pictures.

When I got this response from Sir Luke, it made me realize that I was ‘thinking aloud’ through my posts. By posting army ideas, work-in-progress, or even showcases, a blog is a way to share thoughts and get the communities feedback.

I guess I am still thinking out loud through my blog.

Teach

At some point, I decided to change the focus of the blog and help teach as well. When I was getting started, Ron at From the Warp was a huge part of the online community. But he did so by providing a ton of tutorials and constantly giving back. I was inspired to model my site after his and since have found many other great hobbyists like Dave G doing the same.

Real People Loving the Hobby

When Swordmaster brought up the idea that blogging is about sharing ‘real examples’ it made me think about the online community as a whole. We post pictures of our miniatures, stories of our games, and wishes for future kits. But without an agenda. Well other than the agenda of wanting feedback and how to improve.

Hobby bloggers are real people sitting at the other end of the web.

Creating Something New

And sometimes those other people express their creativity in new ways to play the game. Crimson Oracle is an example of the gamer who starts blogging to share fan-made expansions. The web allows you to become an amateur game designer in your spare time.

Others have a go at fan fiction, either has short stories or as a a back story for their models.

Your Site is Your Own

Another great point about blogging is being able to have it a central point for your hobby. I didn’t think of it that way before, but Crimson Oracle is right in that your blog is controlled by you and you can store anything you want on it.

Pictures of my completed armies, check. Tutorials I want to save for later, check. Tutorials on how I painted my stuff, so I remember years later, check. Even my Good Reads posts could be argued as a way for me to bookmark excellent content.

There is Plenty of Room For You to Teach

Even within the hobby blogging world, there are different styles and focusses. You can follow Golden Deamon winning artists who share their progress and create some fantastic tutorials – but use a bunch of advanced techniques. Then there are those like Scott who are great painters but work to make their tutorials simple.

Whether a conscious decision or not, each of these styles provides benefits to the community as a whole. There are painters of all skill levels trying to learn. And if a hobbyist has a technique or style that they think is missing, it can prompt them to start blogging themselves.

Staying Connected and Reliving a Moment

“I always used to write battle reports for our games, back when my gaming group were young teenagers. Sharing photos was a lot harder back in those days 🙂 The purpose was to re-live the narratives (funny moments) that the game produced, particularly for people who couldn’t make it on the day. When we drifted apart I took up blogging out of nostalgia for those days.” – Marc

Other bloggers start out to remember and share the good memories of gaming with friends. It’s been many years since I’ve seen my original gaming buddies, but I still remember the many games we had on the floor fighting around cans of coke and stacks of books.

The Frustrations and Temptations

But hobby blogging isn’t all fun and games. And it is definitely not a way to make money (despite what all those ads tell you!). Over the years I have seen many hobby sites come and go. Bloggers catch the excitement of writing a blog, only to have the many frustrations of it break that spirit and the site shuts back down.

My site has gone through these phases and almost shut down many times. The new year would bring a flush of inspiration. But by mid-year silence returns and guilt of not blogging builds until it doesn’t make feel ‘right’ to do yet-another-I’m-not-dead-post.

When Tools Get in the Way

Dealing with the blogging platform itself can be a huge sense of frustration. The site crashing right in the middle of a post, images being eaten by a backend upgrade, or the mobile app being difficult to use.

It has become easier to create the look and feel of your site how you want it without touching a line of code. But it still isn’t simple. And if you have a vision of what you want to see, it can be agonizing hours trying to tweak things just right – and then find it breaks the mobile view.

Difficulties Never Stop

“My frustrations.. loads. When my paint won’t go on the mini smoothly, my dusty workspace, getting a hair on a miniature then not realizing until it’s dry.” - Laurence

And then comes the frustrations on the hobby side of the blog. As I posted more, I felt like I should be improving as I was getting traffic and part of the community. But I still have issues like Laurence where my paint doesn’t go on smoothly (this week was the orange for my Blood Bowl team!). Or my desk is a disaster and kills my motivation.

“I find my own cripplingly slow production rate frustrating! Like Marc, finished content is the main feature of, not just my blog but most of my internet presence. Being slow and steady might produce works of art… but it doesn’t do it very quick XD ah well. Such is fate.” – D Powers

I too am a very slow painter. Combined with I get very little painting time in during this season with two small boys, and my production is, as D puts it, cripplingly slow. Where this hurts the most is when I put together a schedule that includes tutorials and showcase posts for projects that should be quick to get done, only to have them linger in the backlog for months.

The Sound of Silence can Hurt

But I think the biggest frustration all hobby bloggers was said well by Cylde:

“Frustrated when no one says nothing, that is I’m not the best painter over the world but I’ve put a lot of interest and time, tell me something, ok that line is too fat, or force a bit more the lights , try to darken the shadows, or just a simple it’s ok. but no silence please.” – Cylde

Unfortunately, this is the story of nearly every new blogger – the people who desire the feedback the most. The internet is a noisy, crowded space and for those trying to get heard, it is upsetting to put so much work into a post, and have it sit silently.

But even for those who have been writing for what seems like forever, a silent post still hits hard.

This is part of the reason that Thor and I have been writing articles on how to improve your blogging. We want to help make it easier for your site to be found. It doesn’t take the short term pain away, but it can help you make steady progress in growing your reader base.

Finding Motivation and Purpose

When you do get comments, it can be exhilarating. I still get excited when I get comments, especially when someone new adds their voice.

“My motivation comes from everywhere, Films, artwork, nature and looking at the best figure painters work on ‘Paint and Putty’ etc…

We only really blog to each other, so when people post their minis we can appreciate the skill and hard work that is part of miniature painting.

I think it’s nice to get comments from other painters and I try to comment and help when I can. It’s a good feeling. “- Laurence

There is a lot of what Laurence said that resonated with me. Between finding inspiration from other painters (pro and beginner alike), each person gives their take on the hobby and seeing their process can open a window into how we can improve in some way.

But I also liked his thought about we are blogging to each other. We are hobby bloggers who wrote for other people in our hobby. This is a similar idea to Swordmaster’s above in that we aren’t trying to preach and market.

An International Game Store

I paint miniatures, and I provide tutorials on how to paint miniatures. Once in a while, I game, and I read posts about gaming. And while few people in our hobby blog, it is great motivation to interact with those who are on this writing journey.

“Mostly, I blog to be part of the online community now. What we have is a bit like an international FLGS with the complete spectrum of interests and abilities amongst us to share.” – Marc

An international FLGS. That is such a great way to put how I feel about the bloggers I follow and those I interact with on social media. Most I haven’t yet met in real life, but I also feel that I now have friends all over the world.

Finding Diversity in Style and Thought

But it is also the huge diversity of thoughts and ideas each brings to the virtual table. Want to paint pristine Space Marines? Enjoy writing huge back stories? Or want to create insanely competitive lists? There are bloggers for that.

Or if you like the darker side of 40k or AoS, there are bloggers like D for that.

“I’d like to think I’m a Blanchitsu disciple; there aren’t many of us around, and we need to make our existence known.” – D Powers

There will be things you may not enjoy (I’m not a competitive gamer, barely a gamer at all right now) but it is easy enough to skip that post and dig into something you do enjoy.

Reading other posts and joining the conversation are fantastic ways to build motivation. Explore new projects. Or use the community to break through when burnout gets you down.

Wrap Up

Building and painting a miniature is hard. Putting it out for the world to see and judge is even more difficult. But then to do it again and again and building up a blog is a challenge of mental endurance.

But if you hold on to why you are blogging in the first place, and find ways to keep yourself motivated, it can be an incredibly rewarding hobby into itself.

Perhaps you are looking to start a hobby blog. Or you need some motivation to keep yours going,. Either way, here is the summary of why to start, and why to keep going. Find your why and add it to the list.

  1. A way to think out loud and share your thoughts with the world
  2. Teaching others through tutorials and battle reports
  3. Create new rules, mini-games, or even full blown games
  4. Provides a central place, a home for your hobby endeavors
  5. Fill a hole in the world of tutorials and styles
  6. Showcasing your commission work
  7. Enjoy the hobby of blogging and writing
  8. Staying connected with friends and making new ones