All posts filed under: Cool Tools

A review of Greyed Out Dice Bags

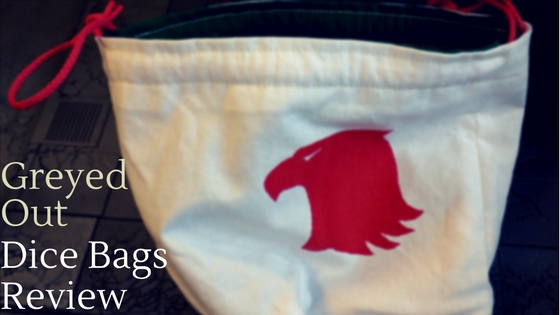
Cool Tools: Greyed Out Dice Bags

I’ve seen @greylikestorms dice bags now and then on Twitter, but never really paid too much attention to them. I thought dice bags were one of those things ‘hardcore’ players did. The same ones who came dressed up in costume or carried a banner to events. But after having the fortunate chance to get to know Mike as part of the Rainbow Warriors Project, I have changed my mind and even bought my own bag. Why Dice Bags? For many tabletop games, dice are used to test skills and perform heroism. Bigger games require more dice. Sometimes whole piles of dice. Looking at you orks and all your dakka Forever I have been using resealable plastic bags to hold my dice between games. Functional, cheap and easy. But they rip or disappear in the fog of war (more likely blown away and picked up as trash). Greyed Out Dice Bags Thanks to the power and reach of Twitter, I have seen Mike’s dice bags pop up now and again. But it wasn’t until we started …

A Look at Sticky Tack and its use in the hobby

Cool Tool: Sticky Tack – and it’s many uses for hobby work

Ready for a Cool Tool I think you should have on your hobby desk? Expecting something big and fancy? How about something simple like sticky tack! Yup, I want to highlight the different ways you can use it for your hobby. OK, while not the coolest thing on my desk at the moment, I have found that sticky tack (silly putty, Blu-Tack, poster putty, etc., ) is a must have. Below I listed a few tricks that I use or have seen other hobbyists use. Holding minis while painting The most common way I use sticky tack is to create a handle while I paint the miniature. This not only makes it easier to hold the model while painti but also prevents me from rubbing off layers of paint with sweaty hands. I found that corks from whiskey bottles make great handles and a big blog of sticky tack holds the miniature in place. One of the benefits (as compared to glue) is that it works on odd surfaces like the banner here. Holding Still …

Cool Tools Bits Box for Organizing Spart Bits

Cool Tool: Bits Box

After building a brand new kit, many new hobbyists wonder why there are so many ‘extra’ pieces left on the sprue. As you make more and more kits, these extras start to pile up. At some point, you need to start the almighty bits box. What might start out as a plastic bag of the remainders can quick add up over the years. In today’s post, I’m going discuss a few ways to organize all those parts, and how doing so can help with your conversion skills. Options for Bits Boxes The term bits box can mean anywhere you store all the extra weapon options, helmets, and even unbuilt kits. Cardboard Box Often, the very first bits box is the same box the kit came in. The full sprues can be slid right back into the box for later use. A nice advantage of using the original box is that you know exactly what kit the part came from. Or if you are in need of the head from a particular set, you can quickly grab …

Using X-Acto Hobby Knife for miniatures and craft projects

Cool Tools: X-Acto Hobby Knife Blades

Today’s Cool Tool is going to feature the mighty X-Acto hobby knife and the ubiquitous #11 blade. While most hobbyists have a set of X-Acto blades in their hobby supplies, did you know there are a bunch of other blades to use? Right tool, right job. For our hobby, having a sharp blade helps with all sorts of things. Removing parts from sprues, scraping mold lines, cutting off unwanted bits, creating battle damage, and cutting plastic card for kitbashing. Affiliate disclaimer: links to amazon are affiliate links, meaning that if you buy them through my link, I get a tiny cut from Amazon (at no change of price to you). Other than the scalpels that I mention below, everything else is products I use and recommend. So if you need new blades and want to help pay for my server bills, consider the links below. The General #11 Blade That is where the mighty #11 X-Acto blade comes in. This is the ‘standard’ blade that comes with most knife kits and the one you see in the …

Review of Warcolours Paintbrushes

Cool Tools: Warcolours Paintbrushes

As you can image from my blog’s title (Broken Paintbrush), I’m rather hard on brushes. Even when using Brush Soap, my detail brushes seem to split almost as soon as I start the second model. This is why I’m excited to review the Warcolours Paintbrushes here. Disclaimer: Warcolours sent me a free set of paints and brushes to review for the Golden D6. The links below do include affiliate links, meaning that if you buy these great brushes, I get a small bonus to help fund this blog. Even though I got these for free, I still only recommend Cool Tools that I actually use and would want you to use too. Warcolours I first heard about Warcolours when Adam from the Golden D6 asked if I wanted to review their line. Try out free paints? Of course, I said yes! So Neo from Warcolours was awesome enough to send me a set of not only their paints but brushes and a pot of powder pigment as well. I wrote up a full review of the …

Cool Tools: Grammarly

This week I have a Cool Tools post that, while it doesn’t directly relate to our hobby, it is a great tool for us hobby bloggers – or any writing you may do. It’s an online extension named Grammarly, and it has significantly improved my writing. Spelling has never been my strong point, and grammar has always been a struggle. I have become to rely on Word’s spell checker and doing Google searches just to check spelling. Why does it matter? If you spend time writing online, be it a hobby blog or on the forums, using proper spelling and grammar can make a huge difference in your readability and credibility. This may not be as much of an issue with our niche of the internet, being very visual in style, but there have been many posts that I’ve glazed over due to rough writing. A misspelled word here and there can be glazed over, especially if we are showcasing our latest project or tutorial. But think of bad spelling/grammar as missed mold lines on a …

Review of the Foldio 2 Photobox

Foldio Unboxing Review

I’ve been struggling with a lightbox setup for quite some time now, and after reading a review from Greggles on the Foldio Lightbox, I recently took the dive and picked one up. I’ve put together my review and a couple of tips I have already found with it. The Foldio was a recent Kickstarter success, with this lightbox being their second, and larger, version. They’ve even got to the point that I was able to pick mine up from Amazon and get it in just two days. The biggest things I was looking for from a lightbox was to be able to break it down and store it between projects. I share my painting/hobby space with my other work projects, so being able to clear out table top room was a must. I had previously built a crude lightbox from an Ikea records box that closed nicely to put on a shelf but took over a whole shelf just to store. It was time to shrink the footprint while getting a larger lightbox – a solution …

Cool Tools: Feedly – Feed Reader Review

Today I bring a review of a non-hobby product, but one I use every day to keep up with my favorite blogs: Feedly – an awesome feed reader. This free tools pulls in the latest posts from all the blogs I follow and keeps track of which articles haven’t been read – which saves me a bunch of time from opening each site up just to see if anything is new. What are RSS Feeds The magic behind feed readers is tech almost as dated as emails: Rich Site Summary, or just RSS. Blogs use RSS to publish a simple text descriptor of each post and push it into a feed that other sites can subscribe to. Many sites include the icon like the screen shot below which has become the universal icon for RSS. The link itself will often take you to a page full of text that isn’t very pretty, but others, such as this blog’s feed at https://www.brokenpaintbrush.com/feed/rss/ use tools to help you subscribe using feed readers. What a Feed Reader Does Back in the …

Cool Tools: Silicon Shapers – Very Helpful for Sculpting

For this week’s cool tool, I’m switching to sculpting. First up, I am very much an amateur in terms of sculpting with most of my green stuff work limited to filling in gaps and details to bits bashed models. The biggest issue I had with using green stuff was that it stuck to everything but the actual model. I tried wetting my tools, using vasoline, even used super glue to fix the GS to the plastic, but nothing was nearly as helpful as when I found silicon shapers. These fantastic little tools are basically paint brushes with a silicon heads in various shapes. For anyone who has used silicon baking dishes, you know how fantastic of a material it is for non-stick properties. I use them in conjunction with the normal metal sculpting tools to push the green stuff into rough form. Since they don’t stick at all to the green stuff they are great at shoving the clay into crevices that I normally struggled with in the past. The different shapes also come in …

Cool Tools: Testors Model Master Plastic Glue

For anyone getting started in the hobby of building plastic miniatures you need three things: clippers, knife, and plastic glue. These things are so basic to our hobby that many of use still use the same tools and glue that we started with, often times the Games Workshop glue for those that started with their models. For me, I started this hobby in the model airplane world which is ruled by Testors, well at least at the big box stores in the US. Those of you who followed a similar path probably remember the tubes of doom that Testors sold as their plastic glue, think of those tiny tubes of super glue, but much bigger, and much messier. Fortunately at some point I bought the Model Master line of plastic glue instead that came in a nice applicator bottle and a metal tip. This changed everything. The tiny metal tip allowed precises control of where the glue would go, and since it wasn’t in a crinkly, old tube, it is also very easy to control …

Cool Tools Wet Palette

Cool Tools: Wet Palette

A tool you will hear from many different painters in our hobby is the mighty wet palette. As much as it sounds like the start of some juvenile joke, a wet palette is simple a container holding a sponge with a paper material sitting on top. The sponge is kept full of water which keeps the paper moist, and in turn keeps the paint sitting on the paper moist. The theory is that you can use the paper as your pallet and it will stay usable as long as the sponge stays wet. Using a Wet Palette Using a wet palette isn’t too different than using a normal palette in the sense you take your paint out of the pot/tube and place it on the palette. The difference is first wetting the sponge with a nice bath of water, enough to make the sponge soggy but not so much that you have free standing water in your container. The paper material is then placed on top and allowed to soak. It is often advisable to flip …

Liquitex Acrylic Paint Retarder

Cool Tools: Acrylic Paint Retarder

Following up on the importance of thinning your paints with airbrush medium, how do you keep the paints wet long enough to work on a large project? I was struggling with this on a hot summer day a few years back and posed that same question to my readers. The two solutions that were provided was a wet pallet and paint retarder. Today I use both options, the wet pallet if I’m painting at the desk or doing blending and the paint retarder when using a standard pallet on the couch. You add a drop or two to your mix and it significant increases the drying time of the paint. This keeps the paint on the pallet usable for longer stints without having to rewet the paint. I have also used it to help with wet blending – though admittedly I am still working on this skill. Since the drying time is increased, you have more time to add the additional colors and work them together. A bottle of the Liquitex brand is only $10 on Amazon …